If you love shooting color negative film and want consistent, cost-effective results on your schedule, home C-41 developing is easier than you think. This guide is for first-time home processors and returning darkroom enthusiasts alike—covering the essentials you need, common pitfalls to avoid, and a few battle-tested product picks available at Unique Photo to set up your color workflow with confidence.
Why Develop C-41 at Home?
Developing color negative (C-41) film at home gives you complete control over quality, turnaround time, and cost per roll. With careful temperature control and a clean workspace, you can get lab-quality results while learning more about your film’s look and how processing affects color and grain.
Essential Gear Checklist
- C-41 chemistry kit (developer, bleach, fixer, stabilizer)
- Light-tight developing tank and reels (plastic or stainless)
- Accurate thermometer (100°F / 38°C range)
- Timer
- Graduated cylinders/jugs for mixing and storage (clearly labeled)
- Water bath for temperature control (large tray/tub or a sous-vide/water heater)
- Film clips or clothespins for drying
- Nitrile gloves, protective eyewear, and good ventilation
- Clean, dust-free drying area
Top Product Recommendations
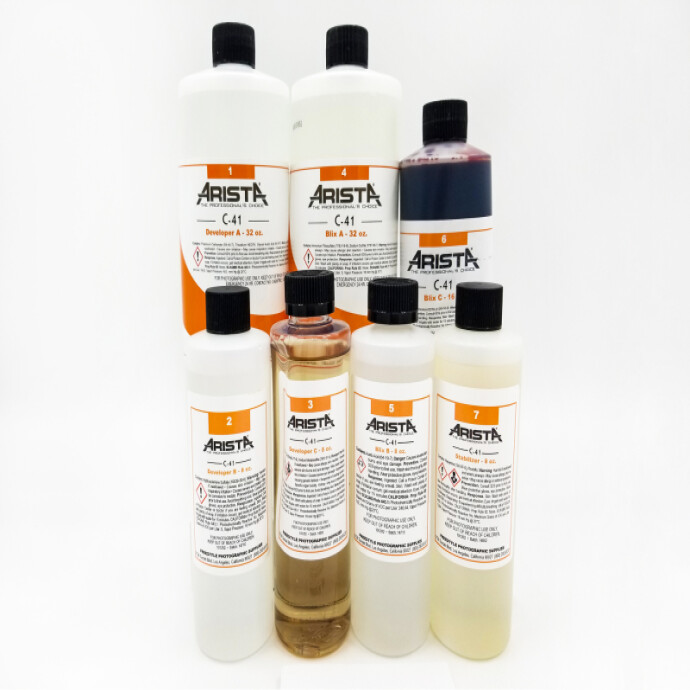
Arista C-41 Liquid Color Negative Developing Kit (to Make 1 Gallon)
The easiest way to start color processing is a complete kit. The Arista C-41 Liquid kit includes the chemistry you need to process standard C-41 color negative films. Liquid concentrates simplify mixing, are beginner-friendly, and help maintain consistency across batches. One-gallon capacity is ideal for higher film throughput and better economy per roll.
Why we like it: Reliable results, straightforward mixing, and a great value for getting into color. Follow the included instructions for times, temperatures, and replenishment guidance.
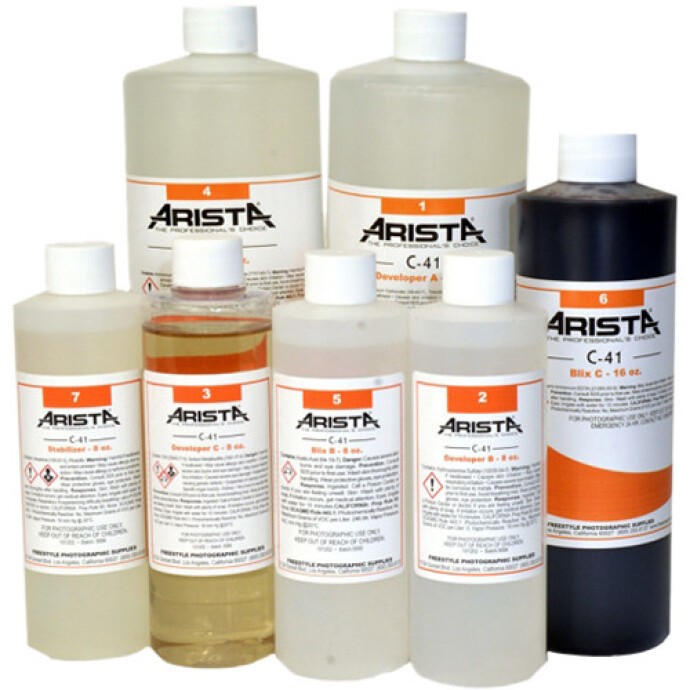
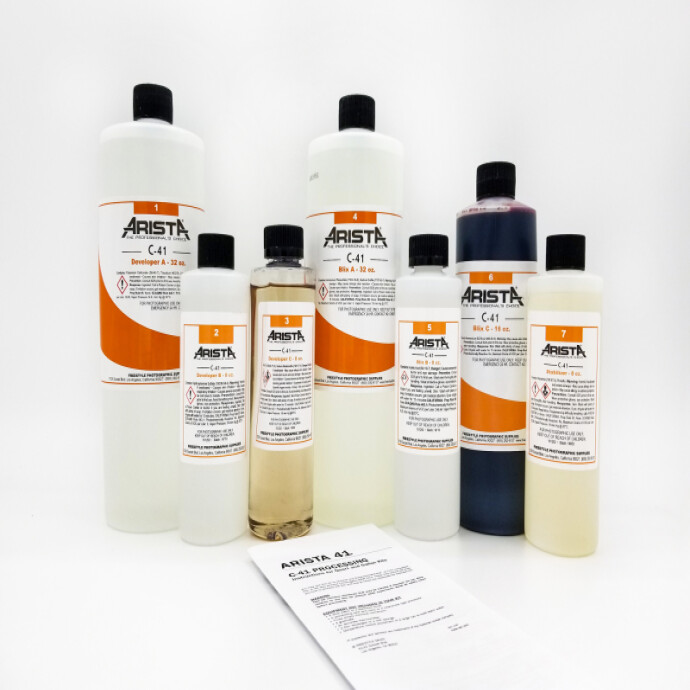
Available at Unique Photo
Paterson Developing Tray 12x16 White
While you’ll use a light-tight tank—not trays—for processing film, a large tray is invaluable as a temperature-control water bath and as a clean workstation. Place your mixed, capped bottles of chemistry in this tray filled with tempered water to bring solutions to processing temperature and keep them there throughout your session. The white interior also makes it easier to spot spills and keep your setup tidy.
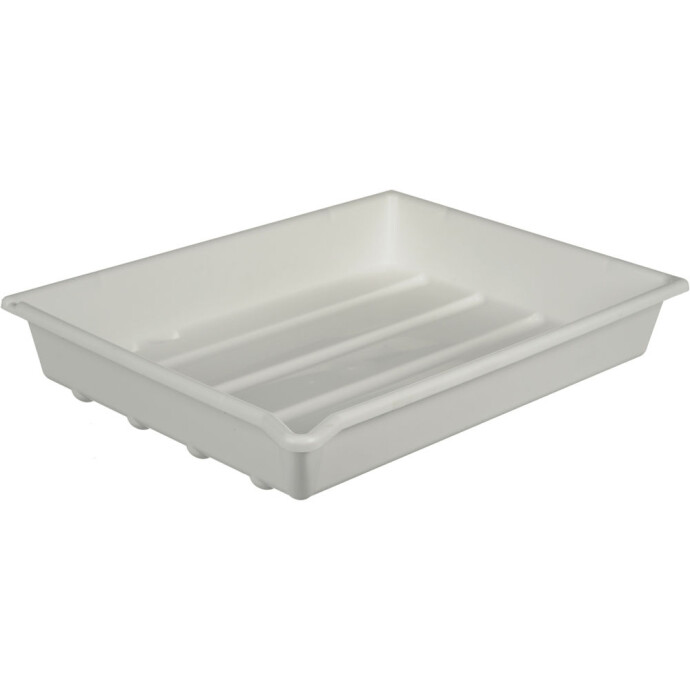
Available at Unique Photo
Samison Plastic Stem for ESA321 Plastic Developing Tank
If you use a compatible Samigon ESA321 plastic developing tank, this replacement stem helps keep your tank in good working order for consistent agitation and leak-resistant processing. Keeping your tank components fresh is vital for even development and avoiding light leaks or agitation issues.
Available at Unique Photo
Process Overview (and How to Keep It Simple)
- Prepare your workspace: Clean surfaces, good ventilation, and a dust-minimized drying area.
- Mix chemistry: Follow the Arista kit instructions precisely, label all bottles, and preheat solutions to the recommended temperature.
- Load film: In total darkness, load the film onto reels and into your tank.
- Maintain temperature: C-41 is sensitive to temperature. Most kits target around 100°F (38°C); always follow your kit’s specific recommendations.
- Process steps: Developer, then bleach, fixer, rinse/wash as directed, and stabilizer last. Do not rinse after stabilizer.
- Drying: Hang in a dust-free area. Avoid squeegees; gently run gloved, wetted fingers down the film if needed.
Always defer to your kit’s data sheet for exact times and temperatures—those instructions trump any general advice.
Common Mistakes to Avoid
- Incorrect temperature: Even small temperature swings can shift color and contrast. Use a stable water bath and verify with a reliable thermometer.
- Contamination: Never share containers or stir sticks between developer, bleach, fix, and stabilizer. Label everything clearly.
- Insufficient bleaching/fixing: Under-bleached or under-fixed film looks muddy and can fade over time. Follow times exactly and ensure chemistry is fresh.
- Rinsing after stabilizer: Don’t rinse after the final stabilizer bath—this defeats its anti-fungal and anti-drying mark properties.
- Rough handling while wet: Emulsion is vulnerable when wet. Avoid squeegee blades; use gentle finger-wiping only if necessary.
- Dirty drying area: Dust will stick to soft emulsion. Keep the drying space clean and still.
Temperature Control Options (Comparison)
| Method | Precision | Cost | Best For | Notes |
|---|---|---|---|---|
| Simple water bath in tray/tub | Good with careful monitoring | Low | Beginners and small batches | Pre-warm bath; rotate bottles to equalize temperatures |
| Water bath with immersion circulator | Very high | Medium | Regular processors seeking repeatability | Set-and-forget temperature control for consistent color |
| Rotary processor (drum) | High | Higher | Heavy users and advanced workflows | Automates agitation and temp; larger upfront investment |
Safety and Handling Tips
- Wear nitrile gloves and eye protection; avoid skin contact with chemistry.
- Work in a well-ventilated area; cap bottles when not in use.
- Store chemicals away from children and pets; never use food containers.
- Dispose of chemistry responsibly according to local regulations.
Our Pick
Final Thoughts
With the right kit, a steady water bath, and attention to cleanliness, home C-41 is absolutely achievable—and rewarding. Start with the Arista C-41 Liquid kit for dependable results, use a large tray to keep temperatures stable, keep your tank parts in good condition, and follow your kit instructions to the letter. Have questions or need to expand your setup? Visit Unique Photo online or in-store—we’ll help you pick the right tools for beautiful color negatives, roll after roll.