Who this guide is for
If you shoot film and find yourself battling low light, harsh midday contrast, or chasing a specific look, you’ve probably wondered whether you should push or pull your film. This buying guide explains when each technique makes sense, what to expect from your negatives and prints, and which tools can help you get consistent results—whether you work with a lab or digitize at home.
What does “push” and “pull” mean?
Both are exposure and development techniques applied to an entire roll of film:
- Pushing: Rate the film at a higher ISO than box speed (e.g., shoot ISO 400 film at ISO 800 or 1600), then extend development to compensate. Expect more contrast, more visible grain, and deeper shadows.
- Pulling: Rate the film at a lower ISO (e.g., shoot ISO 400 at ISO 200), then reduce development. Expect lower contrast, smoother grain, and more open shadows.
Important: You set the exposure at the camera, but the compensation happens during development. Because a whole roll is developed at once, keep a consistent exposure index (EI) for the entire roll.
When you should push
- Low light without a tripod: Night street, concerts, indoor events where you need faster shutter speeds.
- Gritty, high-contrast look: Stronger blacks, punchier midtones, and grain character—especially in B&W.
- Fast action: When you must prioritize shutter speed over ideal exposure.
Guideline for B&W: +1 stop push ≈ +20–30% development time; +2 stops ≈ +40–60%. Lab processes vary—always consult your lab or test at home with your preferred developer.
Color negative (C‑41): Pushing is possible, but expect color shifts and increased contrast; many labs allow +1 stop, sometimes +2. Slide film (E‑6): Very limited latitude—pushes or pulls beyond ±1 stop can produce strong color shifts and are less predictable.
When you should pull
- Harsh, contrasty light: Midday sun and high-contrast scenes where you want smoother tones and better shadow detail.
- Portraits: Softer contrast and skin tones, especially with B&W.
- Intentional overexposure: Some color negatives handle overexposure gracefully—pulling can tame contrast in the final negative.
Guideline for B&W: -1 stop pull ≈ -20–30% development time. Color negative pulls can desaturate and lower contrast; not all labs offer pulls.
How to meter for push and pull
- Rate at your chosen EI from the start of the roll (e.g., set ISO 800 for a +1 push from a 400 film).
- Meter for the shadows for B&W when pushing; you’ll preserve more detail while embracing deeper blacks.
- Keep consistent notes: Film stock, EI, scene conditions, and intended push/pull so you can instruct your lab.
Talking to your lab
- Write push/pull instructions clearly: e.g., “Push +1” or “Pull -1” on the order and envelope.
- Understand lab limits and fees: Not every lab offers push/pull, and some limit to ±1 stop for color.
- Expect the look: Pushed negatives may scan dense in highlights and thin in shadows; pulled negatives scan flatter—plan on tonal adjustments during scanning or printing.
Scanning and printing considerations
- Pushed B&W: You’ll likely need to tame contrast and grain during scanning. A controlled camera-scanning setup helps pull all the detail you captured.
- Pulled B&W: Start with flatter scans; add contrast selectively in post or during darkroom printing.
- Color: Pushing often introduces warm shifts and higher contrast; neutralize color casts during scanning or when making RA‑4 prints.
Quick reference: Push vs. pull
| Scenario | Push or Pull? | Set Camera ISO | Development Adjustment (B&W) | Expected Look | Best For |
|---|---|---|---|---|---|
| Low light / fast shutter | Push +1 to +2 | Higher than box (e.g., 400 → 800/1600) | +20–60% time | More contrast, more grain, deeper blacks | Concerts, night street, sports |
| Harsh sun / high contrast | Pull -1 | Lower than box (e.g., 400 → 200) | -20–30% time | Lower contrast, smoother tones | Portraits, midday landscapes |
| Color negative (C‑41) | Push sparingly | +1 common; +2 sometimes | Lab dependent | Higher contrast, possible color shifts | Low light color work |
| Slide (E‑6) | Avoid if possible | Stick to box or ±1 max | Lab dependent | Strong color shifts, narrow latitude | Use filters or bracket instead |
Product recommendations to support a push/pull workflow
While pushing and pulling are technique-driven, the right tools make it easier to meter accurately, digitize consistently, and produce finished prints you love.
Fujifilm MCEX-16 16mm Extension Tube for Fujifilm X-Mount (SKU: FJDX1721)
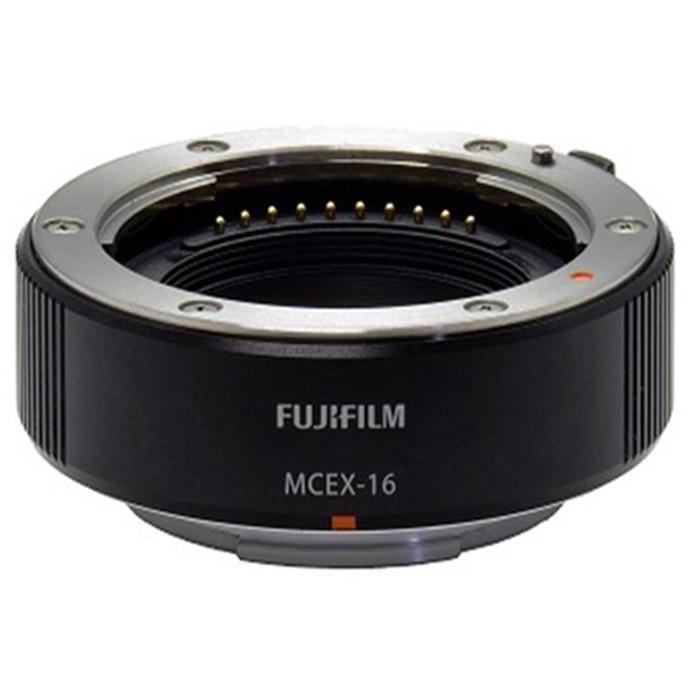
Why it helps: If you camera-scan your negatives, extension tubes boost magnification so you can fill the frame with 35mm, 120, or 110 frames using a macro-capable lens. That extra reach helps you resolve the finer grain and tonal differences that pushing and pulling create—giving you more data to work with in post.
- Increases close-focus for macro duplication
- Maintains electronic communication with Fujifilm X lenses
- Great for travel-friendly scanning setups
Fujifilm BC-T125 Battery Charger for GFX 50S/50R/GFX100 (SKU: FJDX0510)
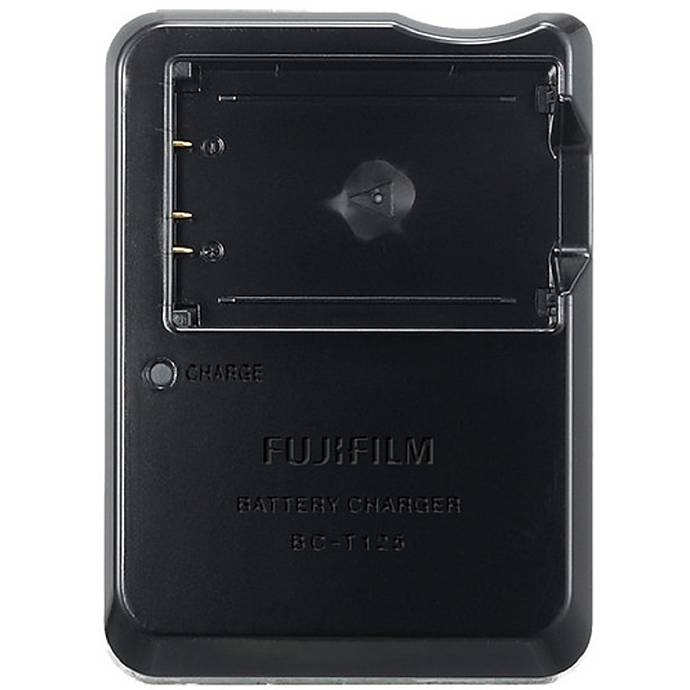
Why it helps: Whether you’re metering with a mirrorless body on location or digitizing dozens of frames at home, steady power keeps your workflow moving. This dedicated charger ensures your GFX batteries are topped up for long scanning sessions or on-the-go metering and reference shots.
- Fast, reliable charging for GFX batteries
- Ideal for hybrid film-to-digital workflows
Tamron RMC-FUJI Rear Lens Cap for Fujifilm X Mount (SKU: TML8498)
Why it helps: Protect the rear element of your macro or duplication lens between scanning sessions. Clean optics reduce flare and maintain micro-contrast—key when you’re evaluating subtle differences from push or pull processing.
- Durable rear cap for Fujifilm X-mount lenses
- Simple protection for clean, consistent scans
Fujifilm DIGITAL PRO 12x354 Glossy Color Paper (SKU: FJP24312)

Why it helps: After dialing in your push/pull process, finish the look with consistent RA‑4 color prints. This glossy paper roll is a lab-grade choice for turning your digitized negatives into exhibition-ready prints with punchy contrast or smooth tones—depending on your processing choices.
- Glossy finish for vibrant color output
- Excellent for proofing and final prints from scanned negatives
Fujifilm Sky Blue Ink for DX400W (SKU: FJD31030)
Why it helps: Running a dry lab or in-house proofing workflow? Consistent inks ensure your test prints reflect the tonal and color shifts introduced by push or pull processing, so you can make reliable adjustments before final output.
- Optimized for Fujifilm DX400W dry lab systems
- Accurate color for dependable proofing
Our Pick
Fujifilm MCEX-16 16mm Extension Tube for X-Mount is our top accessory for film shooters embracing push/pull. Precise camera-scanning reveals the nuanced contrast and grain you’re shaping in development—essential for repeatable results and high-quality archiving.
Practical tips for consistent results
- Test on a familiar stock: Start with a B&W film you know well; try +1 and -1 before going further.
- Bracket a frame or two: Even when pushing, a small bracket can reveal how your lab’s process responds.
- Take notes: Film, EI, developer or lab settings, lighting conditions, and your impression of the results.
Conclusion: A clear path to better negatives
Push when you need speed or extra punch; pull when you want smoother tones in tough, contrasty light. Start with modest ±1 stop adjustments, communicate clearly with your lab, and assess your results through consistent scanning or printing. When you’re ready to refine your workflow, visit Unique Photo for the accessories that help you see the differences—like the Fujifilm MCEX-16 for camera-scanning—and the printing supplies to finish your vision. Our team is here to help you choose the right tools for a reliable push/pull process.