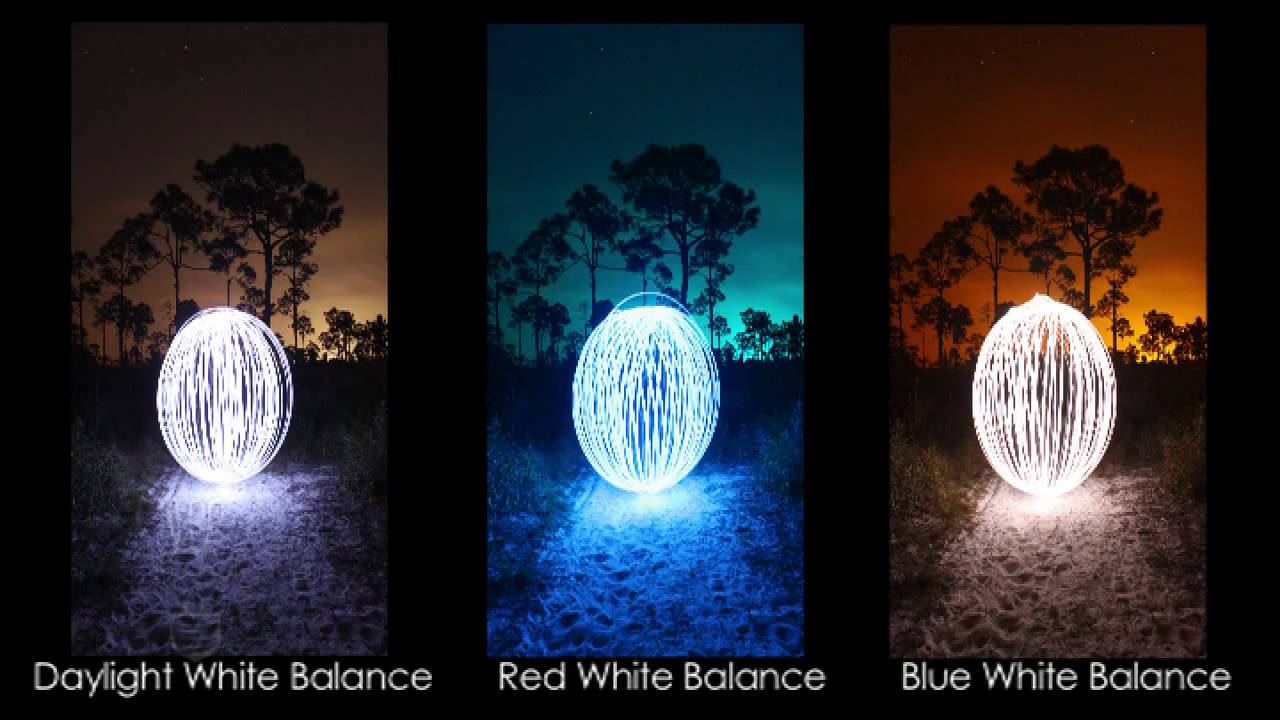
White Balance photography is one of the basics of photography. A lot of DSLR users are ignorant of the subject. Before we start with the ‘hows’ and ‘whats,’ we will discuss the ‘whys.’ White Balance photography is essential, because it helps you manage colors of an image, and lets you capture the colors that are closest to the accurate colors. Light is made up of different colors, and these colors show up in photographs; like an image may have a blue or slightly orange tint to it. Balancing this will help you get a more appealing photograph.
What is white balance photography?

The light source of an environment affects the way objects are seen. Since you know photography basics, you’ll know that the camera clicking an image and an eye seeing an image are similar. To the naked eye, all objects under different lights seem the same, because the eye corrects the difference and adjusts itself. But when it comes to our DSLRs, they are unable to do so, and our images tend to get tinges of various colors, depending on the temperature of the light source. Click a few photos in different lights, like outdoor under sunlight, under a tungsten bulb light, fluorescent light, etc., and you’ll know the difference. White Balance in photography is what can manage this effect for our cameras. Let us look at some tips to nail white balance in photography.
White Balance Setting modes

Every camera has different DSLR settings for white balance, so you’ll need to read your DSLR manual in order to understand what will work for your camera. Usually, all cameras have semi-automatic and automatic modes to make adjustments in White Balance photography. Here are some preset modes that’ll help you understand how to set White Balance photography modes in your camera.
Auto – This is the camera’s best guess on what the White Balance setting should be on a shot-by-shot basis. It is great in some situations, but trying and experimenting a little will always get you some interesting images.
Daylight – Sun setting. This is the setting for the sun. It is similar to auto, and is the normal White Balance setting. This setting may not be present in many cameras.
Cloudy – Cloud setting. For the days when the light outside isn’t enough, this setting adds warm tones of colors to your images. The pictures turn out the way they’d in normal daylight. However, you should take care, because sometimes, this may end up giving the images a slight yellowish tint.
Shade – Shade setting. If you’re shooting in the shade, the images may turn out a little bluish. This setting adds warm tones to the images.
Tungsten – Light bulb setting. If you’re shooting indoors under a light bulb or incandescent lighting, then this mode will help you cool down the colors in the photos and give them a more natural look.
Fluorescent – Strip light setting. For shots taken under the greenish-blue or cool effect of the fluorescent light, this setting will help in adding warm tones to the images.
Flash – Lightning bolt setting. When you use the flash, try this setting, and your image will not turn out blue from the flash. This setting adds warm tones to the image.
Manual adjustments in White Balance

The preset White Balance photography modes are good for most of the cameras. However, some DSLRs give you the option of choosing manual settings. For the manual settings, you need to give your camera a reference as to what the correct white-light setting for an image should look like.
You can do this either by using a white or gray card, specifically made for this purpose, or you can use any other white-colored object. You need to find the manual adjustment setting in your camera on the menu. The manual setting is a three-step process. First, you click an object of your choice.
Then you take the picture of the white card to show your camera what white balance should be like. Again, repeat clicking the first object with this setting. You’ll see a marked difference, as well as a better and truer color in the image.
Trying out different White Balance photography modes will help you understand this concept better. Photography is a practical and fun activity, and the more you practice, the more perfect you’ll get at it.