Written by Brittany G.
Photo Credits to Brittany G.
Looking to enhance your images or want to work around the natural glares from glass and water? Similar to wearing sunglasses in the day, Circular Polarizer can act as sunglasses for your lens! In this article we will be covering what they are, what they affect, and how you can use them to enhance your imagery.
What Exactly is a Circular Polarizing Filter?
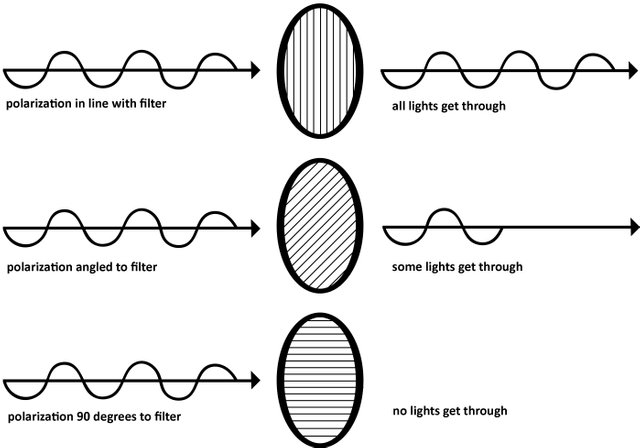
A Circular Polarizing Filter simply is designed to remove reflections off some surfaces. In a more technical sense, they reduces reflections and glare from light that has become polarized with the reflection from a non-metallic surface.
Filters of this type are typically composed of two sections joined together. The first section actually contains the glass while the second section is the piece that threads onto your lens physically. Due to this two part filter, it actually allows you to freely rotate the front half which in turn, will control the polarization effect it achieves.
Effects of a Circular Polarizer
The Circular Polarizer Filter will reduce the glare and reflections ranging from water, glass, and some metals. It even can reduce haze in some applications! Due to the nature in which this type of filter works, it will also enhance the color and contrast of what you see. It will enhance your blues, greens, and whites - which make this filter a must have for anyone working with landscapes.


Left: No CPL filter vs Right: CPL Filter
You can see how much deeper the greens are in the right image compared to the left utilizing the Circular Polarizer
These filters will allow less light into your lens, so depending on the brand you buy your filter from it can range from about 1-3 stops of light loss. Your camera may show that your exposure meter is lower than expected, and to increase your exposure, due to this loss of light. So be mindful that in some circumstances a tripod will need to be used if your shutter speed has to be open longer to compensate for light loss.
Another thing to keep in mind is that the polarization effect may not have a uniform change across - especially when using it with wide-angle lenses. For example, when shooting with a sky in frame, and getting the darker blue tones with your circular polarizer, you may notice the sky will shift from normal to dark in an unnatural way. So it is always recommended to be mindful of what lens you are using with your filter, as it may affect your final piece in a negative way. (unless that is the look you are going for!)
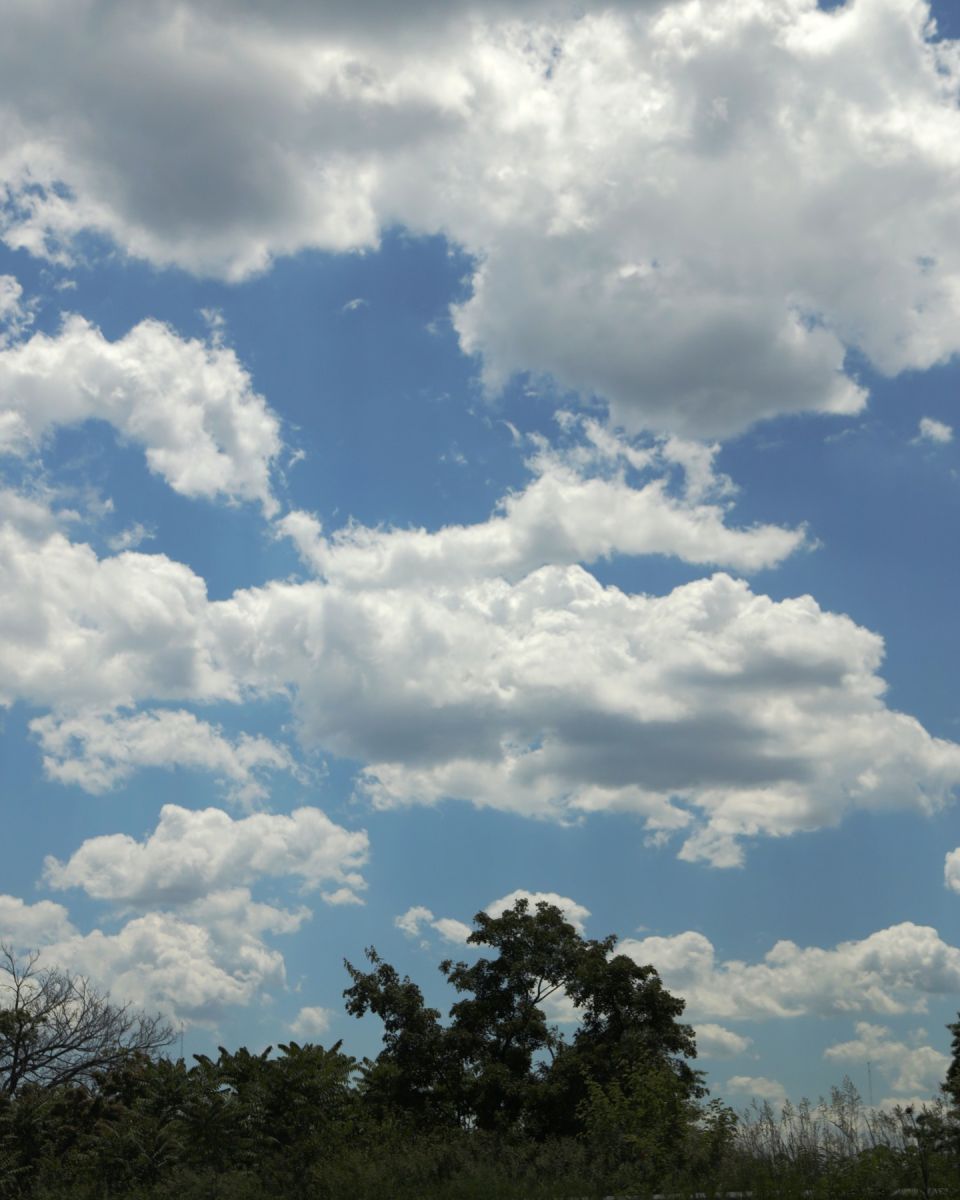
Seen above is the CPL filter enhancing the blue sky and white clouds to create more contrast
In regards to reflective surfaces, the circular polarizing filter perform phenomenally as they can enhance your scenes by eliminating or reducing the reflections from water and glass.
While water and glass are the most common reflective surfaces to use this filter on, the minimizing effect also applies to some metal surface. With this in mind, the circular polarizing filter is a great match for anyone interesting in car photography! It will reduce or eliminate the glare you normally see in the paint on cars for both photography or videography.
You ultimately control where and how much polarization will affect your photo, so don't be afraid to experiment with different scenes, and lenses to find out what combination works best for your needs.
How to Use Them Effectively
Technically you could just place the filter on your lens and rotate it while live viewing your image on your camera display or viewfinder. This allowing you to just take images in bulk while slightly adjusting your settings, and filter rotation and eventually getting the best picture of the bunch. While this is the simplest way to use it, you may have a small time frame, or be in a rush, so let's look at the most effective way to use the filter.
One of the most important things to remember when trying to use circular polarizers effectively is that they work best when 90° from the light source or sun. With this in mind you will avoid making minor mistakes. For example, with this factor in mind you should never find yourself using your setup and circular polarizer filter while facing your lens directly towards the sun (or other light source).
Plus, if you do choose to have your filter on while facing the sun, it may end up doing more harm then good!
Since it adds an extra piece of glass in front of your lens, they tend to produce more sun flares in your final product. So when you're looking to shoot sunrises and sunsets, though the greens and blues in the nature around the framed scene may be enhanced, having it faced at the sun will do nothing good for your final. So be sure to leave your sunrises and sunsets to the ND Filters to get the best balance of your colors and exposure.
Remember to pay close attention to the details and the areas that are most important to you in the frame. You are the one in control, so if an area doesn't look quite right snap a shot, and then rotate your filter to see if the final product is just being affected by the light source being filtered out. Being aware of your subject and where the light is coming from will be an important factor to keep in mind in order to utilize your circular polarizer.

The greens in this image just pop! The CPL filter enhanced the contrast on the leaves even with this macro shot
So, next time you're packing your gear back, think about having a circular polarizer in your filter collection! Even if you are just experimenting with it to start, you'll start to notice the differences in your final work - even if it's just to enhance your colors on your landscapes. You'll find yourself editing less in post production for colors, and as you become more familiar with using it, you'll find it being one of the filters you use the most!
Do you have a circular polarizing filter you love? Tell us all about it! Comment below and lets start a conversation on how you use your filters and some of the best cases it has enhanced your photos and videos!