Indoor Editorial Photography: Pro Settings, Lighting, and Workflow FAQ
Shooting editorial features indoors demands fast problem-solving, clean color, and a look that flatters your subject and environment. Our experts break down practical settings and techniques so you can walk into any room and deliver a magazine-ready result.
How do I manage mixed lighting on location?
Start by identifying the dominant light you want to feature. If the room’s ambient is attractive (e.g., warm tungsten practicals), set a matching white balance in-camera (around 3000–3400K) or create a custom WB with a gray card. Gel your flash to match (1/4–1/2 CTO for tungsten, plus green for fluorescent) so all sources live in the same color family. If the ambient is ugly or inconsistent, turn off offending fixtures and let your strobe or a single window source become the hero.
Position matters as much as color. An overhead or slightly forward key keeps features editorial and flattering. A stable boom makes this easy—Kupo’s C-Stand Overhead Shooting Kits are purpose-built for placing a soft source above a desk, table, or seated subject without cluttering the frame. Add negative fill (black foam core) camera-opposite to regain contrast in bright rooms.
What aperture and ISO work best for editorial portraiture indoors?
For single-subject environmental portraits, f/2 to f/2.8 gives separation while keeping enough context sharp. If the background has important story elements or you need safer focus, move to f/3.2–f/4. For small groups, aim for f/5.6–f/8. Base your ISO on how much ambient you want and the shutter speed you need: ISO 400–800 is a clean starting point on modern cameras; bump to ISO 1600 in dim rooms to hold a workable shutter speed without over-relying on flash. Keep an eye on highlight headroom for skin—protect it and lift shadows later if needed.
How do I balance ambient and flash for a magazine-style look?
Use the ambient as your base and place the flash for shape. A simple recipe: meter the room to be about one stop under your subject’s key exposure, then add a soft off-camera flash as your key. In manual, try ISO 800, f/2.8, 1/200 sec to start. Adjust shutter to taste: slower brightens background only; faster darkens it without changing flash exposure. If you prefer TTL, dial Flash Exposure Compensation between −0.3 and −1.0 to keep the flash subtle. Always gel the flash to match the room for consistent skin tones.
What shutter speed prevents blur without killing the mood?
For a standing subject, 1/125–1/200 sec is a safe handheld baseline; if your subject gesticulates or you’re shooting tighter than 85mm, move toward 1/200–1/250 sec. When using flash as the key, the burst can freeze the subject even at 1/60 sec, but background elements lit by ambient may blur—decide whether that adds energy or distraction. Stabilization helps a lot; a compact grip/tripod also buys steadiness without blocking the room.
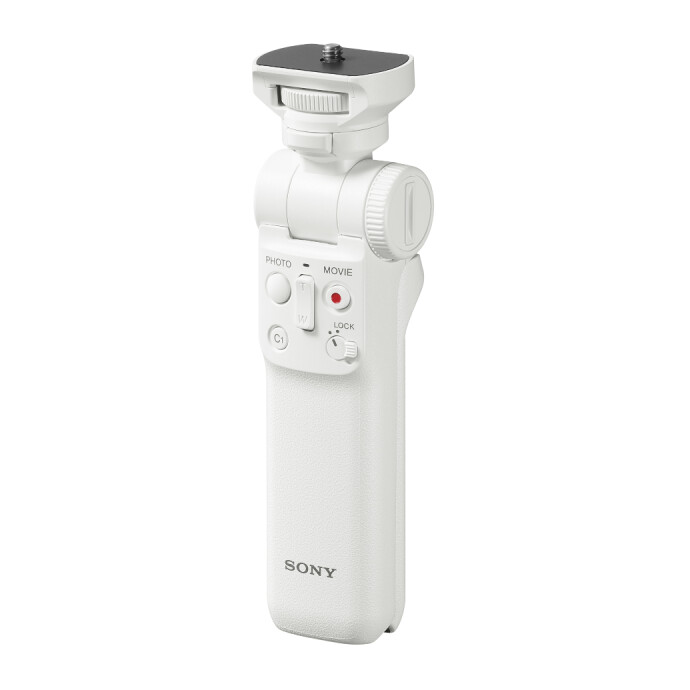
The Sony GPVPT2BT Wireless Shooting Grip is a tidy solution for run-and-gun features and hybrid teams—remote control, quick angle changes, and a small footprint keep you agile in tight spaces.
How do I keep color consistent across multiple rooms?
Document a neutral reference in each scene. Shoot a gray card or color target at the subject’s position, set custom WB when practical, and synchronize images in post using that reference. If you must work fast, lock a Kelvin WB that’s close to the room’s dominant source and tag quick reference frames each time lighting changes. Replace problematic bulbs when allowed—swapping a greenish CFL for a warmer LED can save minutes of post per image. Maintain one camera profile per feature to keep skin tones cohesive from chapter to chapter.
Any composition tips specific to editorial features?
Compose for story first: layer foreground elements, use leading lines, and leave negative space for potential text. Keep verticals straight unless you’re intentionally using a dynamic tilt. Deliverables often include verticals for covers or social—switching orientation cleanly is key. A vertical mount plate, like the SmallRig Video Head Mount Plate for Vertical Shooting 4104, lets you flip quickly without shifting your lens axis or reframing the whole scene.

If you want to sharpen your eye for strong, publishable frames, our class “Understanding Your Camera III: Composition and Shooting (Philly)” dives into practical composition that translates directly to editorial work.
What gear helps when space is tight or when I need tabletop scenes?
Use slim stands and overhead booms to keep legs out of frame. Kupo C-Stand Overhead Shooting Kits are great for floating a softbox or flag above the action. For product or detail vignettes inside a feature, a portable shooting surface speeds setup and keeps reflections predictable.
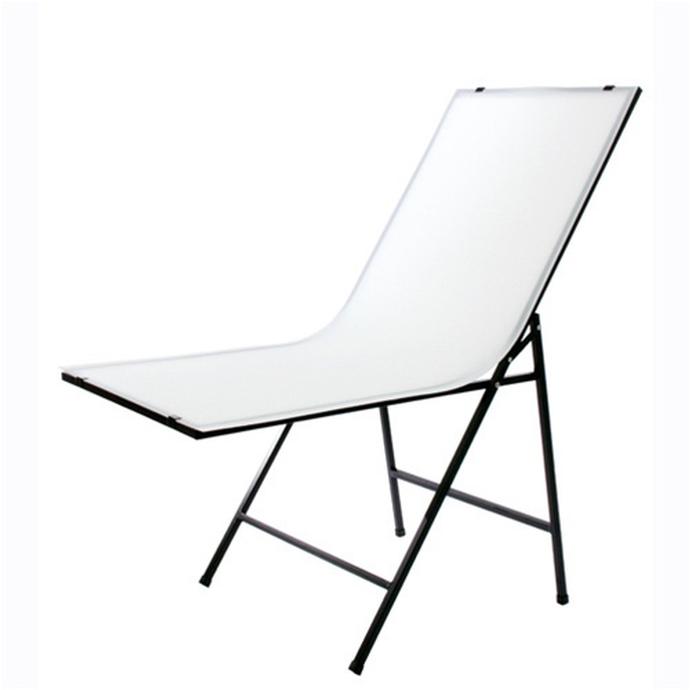
The RPS Studio Portable Folding Shooting Table collapses flat, sets up fast, and gives you a clean sweep for small props and food—perfect for those editorial detail shots that open or close a story.
How can I work faster on set while protecting skin tones?
Enable zebras around 70–75% for caucasian skin and slightly lower for deeper skin tones; it’s a quick way to avoid clipping while keeping faces luminous. Use your in-camera histogram and highlight alerts to audit the background. If you’re in a hurry, set your flash on TTL, flag or feather the light for shape, and ride FEC in third stops. Pre-light before the subject arrives and build a repeatable A/B setup when a feature has multiple rooms with similar coverage.
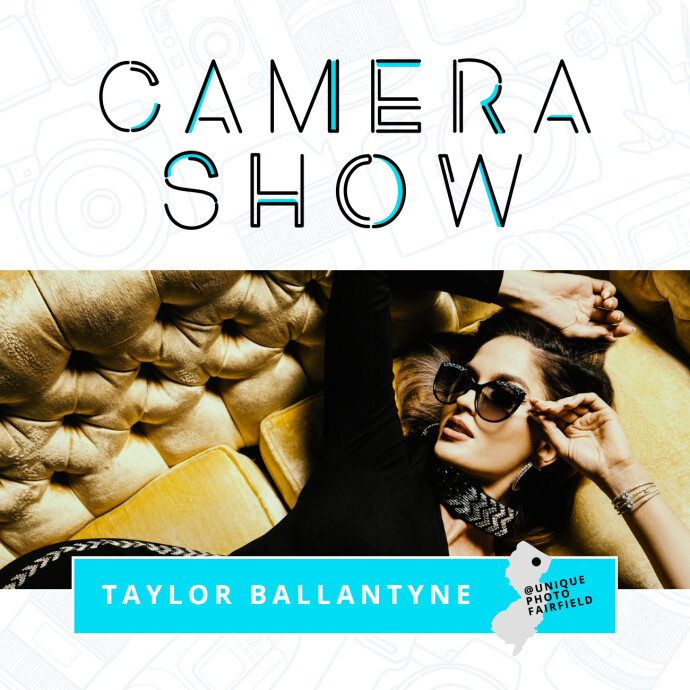
For a deeper dive into fast, brand-friendly lighting and color that plays well on web and print, check out “Shooting Commercials for Social Media with Taylor Ballantyne (Sony)” at Unique University.
Any tips for capturing natural movement without blur?
Editorial portraits feel alive when you let micro-movements in—hair touch, a step, a laugh. Coach small motions, then time your exposure for the pause at the end of the gesture. Use burst mode at 1/200–1/250 sec if you’re relying on ambient, or let flash freeze the peak moment at 1/160 sec. Anticipation skills honed in action shooting translate well to lively editorial features.
Want to sharpen timing and anticipation? Our “Shooting Sports Photography with Nikon” class builds reflexes that help you hit decisive moments—even in quiet editorial settings.
From color strategy to camera settings and space-saving support gear, Unique Photo has the tools and training to elevate your indoor editorial work. Visit us in-store or online to outfit your kit and explore our Unique University classes tailored to real-world assignments.