Sharp landscape photography is about much more than buying a high-resolution camera. The biggest difference usually comes from technique: how you focus, when you shoot, how stable your setup is, and which small details you pay attention to before pressing the shutter. If your images sometimes look slightly soft even when everything seemed right in the field, these tips can help you avoid the most common mistakes and pick up a few hidden tricks that lead to noticeably crisper results.
For photographers who want to keep learning beyond field practice, books like Art Science Craft of Great Landscape Photo by Glenn Randall and The Landscape Photography Book by Scott Kelby can be great references for sharpening both your technical and creative decision-making.

Start With Stability Before You Touch Focus
1. Eliminate camera movement first
One of the most common landscape mistakes is assuming softness comes from bad focus when the real issue is vibration. Wind, an unstable tripod, a shaky platform, or even pressing the shutter too firmly can all reduce sharpness. Before you fine-tune focus, make sure your camera is as still as possible. Use a solid support, a self-timer, or a remote release, and be extra careful on bridges, boardwalks, and rocky overlooks where the ground may shift under your feet.
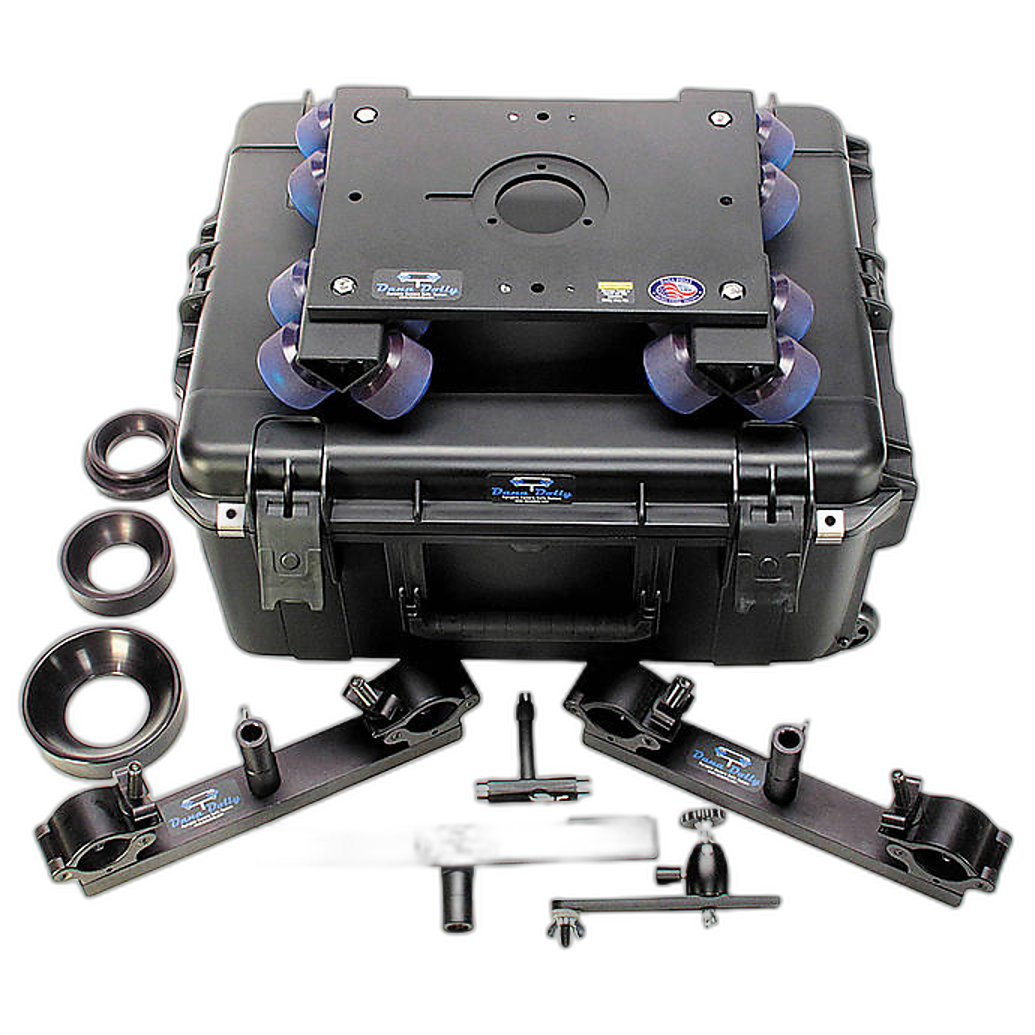
If you're building more advanced scenic motion or time-lapse setups, a support solution like the RENTAL ONLY - Dana Dolly Kit with Track and Stands can help create controlled camera movement without introducing the random shake that ruins detail. Even though it's more often associated with motion work, stable support systems are just as important when precision matters.
2. Watch for hidden vibration sources
Sharpness can suffer from subtle issues you barely notice in the moment: image stabilization left on while the camera is locked down, tripod legs not fully tightened, or a center column extended too high. In windy conditions, hang less gear from your tripod if it causes sway, and shield the setup with your body when possible. The less movement your system has, the more your lens and sensor can actually deliver.
Focus More Intentionally
3. Don’t always focus on the horizon
A frequent mistake is focusing at infinity for every landscape. That works sometimes, but not always. If you have strong foreground elements, focusing too far away can leave nearby texture softer than it should be. Instead, choose a focus point based on your composition and depth of field. Many scenes benefit from focusing roughly a third into the frame, while others call for more precise hyperfocal techniques or even focus stacking.
4. Use magnified live view to confirm detail
Autofocus is useful, but for maximum precision on landscapes, magnified live view is one of the best hidden tricks. Zoom in on a key detail like rocks, tree bark, or a ridge line and manually refine focus. This is especially helpful in dim light, at sunrise, or when atmospheric haze makes autofocus less reliable. Taking a few extra seconds here often saves an otherwise great image.
5. Be careful with very small apertures
Many photographers stop down to f/16 or f/22 thinking it guarantees maximum sharpness from front to back. The catch is diffraction: at very small apertures, overall crispness can drop. In many landscape situations, lenses perform best somewhere around f/8 to f/11. That often gives a better balance of depth of field and optical sharpness. If you need more depth than that provides, focus stacking may produce a sharper final image than simply closing the aperture further.
Optimize Exposure for Maximum Detail
6. Use a shutter speed that matches the conditions
Even with a stable camera, the landscape itself may be moving. Grass, leaves, flowers, and branches can blur in a breeze. If your foreground is important, check whether your shutter speed is fast enough to freeze that motion. A tack-sharp mountain in the background won't matter much if the most interesting foreground elements are soft from wind movement.
7. Raise ISO when it helps preserve sharpness
Landscape photographers often try to keep ISO at its lowest setting, but that can backfire if it forces a shutter speed that is too slow for wind or handheld shooting. A modest ISO increase is usually better than a blurry file. Noise can often be reduced in post; missed detail cannot be restored nearly as easily.
8. Avoid clipping highlights that hold texture
Perceived sharpness often comes from micro-contrast and fine tonal detail. Bright clouds, snow, waterfalls, and sunlit rock can lose texture if overexposed. Expose carefully so those details remain intact. The result will often look sharper, even before editing.
Pay Attention to the Environment
9. Shoot when the air is clearer
Not all softness is caused by your camera settings. Heat shimmer, humidity, dust, and haze can all reduce clarity, especially in distant subjects. Early morning often offers cleaner, steadier air than midafternoon. If a far-off ridgeline looks mushy no matter what you do, atmosphere may be the real culprit.
10. Clean your lens and check your filters
Another hidden sharpness killer is dirty glass. Smudges, salt spray, mist, and low-quality or dirty filters can reduce contrast and make details appear softer. Before a big sunrise or sunset shoot, quickly inspect your front element and any filters. It's a simple habit that can save important frames.
Use Smart Tools for Special Situations
11. Add light carefully for close foreground detail
Most landscapes rely on natural light, but in certain situations, subtle supplemental lighting can help bring out texture in a foreground subject without sacrificing overall scene quality. For example, if you're photographing rocks, plants, or small environmental details at dusk, a compact lighting tool such as a used Light & Motion CLx10 Imaging Kit can provide controlled fill to separate texture and improve local contrast. Used options in excellent, good, or fair condition can be a practical way to experiment with creative field lighting.

12. Consider remote or fixed-angle capture for hard-to-reach views
While traditional still cameras remain the go-to for most landscape photography, there are situations where a specialized camera can help secure stable composition from a distance. A system like the Canon CR-N700 4K PTZ Camera is designed more for professional remote operation and video workflows, but it highlights an important lesson: removing physical contact with the camera can reduce shake and improve consistency. For challenging viewpoints, remote operation concepts can help you think more carefully about stability and repeatability.

Keep Learning and Reviewing Your Results
13. Study your soft images instead of deleting them immediately
One of the fastest ways to improve sharpness is to review failures carefully. Was the softness caused by missed focus, subject motion, camera shake, diffraction, or atmosphere? When you can identify the exact cause, you start correcting it in the field much faster. Educational guides like Glenn Randall's Art Science Craft of Great Landscape Photo and Scott Kelby's The Landscape Photography Book are useful resources for building that kind of practical judgment.

14. Shoot small variations of the same composition
Instead of making one frame and moving on, try a short sequence with slight adjustments in focus point, aperture, and shutter speed. This gives you insurance and teaches you what works best in real conditions. Over time, you'll develop a more reliable instinct for getting sharp results on the first try.
Conclusion
Sharper landscape images usually come from stacking small good habits: better stability, more intentional focus, smarter aperture choices, and closer attention to environmental conditions. A few hidden tricks, like checking for vibration, using magnified live view, and reviewing your misses, can make a surprisingly big difference. Keep practicing, keep refining your process, and if you're looking for photography books, support tools, rentals, or creative accessories, Unique Photo is a great place to continue building your landscape kit and skills.