Beautiful skin tones can make a portrait feel natural, polished, and emotionally engaging. Whether you're shooting in a studio, outdoors, or even on a phone, getting flattering color in skin is often a combination of light, exposure, white balance, and thoughtful finishing. Below are practical tips to help you create portraits with more accurate, pleasing skin tones every time.
Start With Better Light
1. Use soft, directional light whenever possible
Skin usually looks its best under soft light with gentle contrast. Window light, open shade, and diffused studio setups can all help reduce harsh color shifts and exaggerated texture. If you're studying how portrait lighting influences color and mood, workshops like Stunning Portraits Workshop with David Maynard and ExpoImaging can be a great way to see flattering portrait light in action.
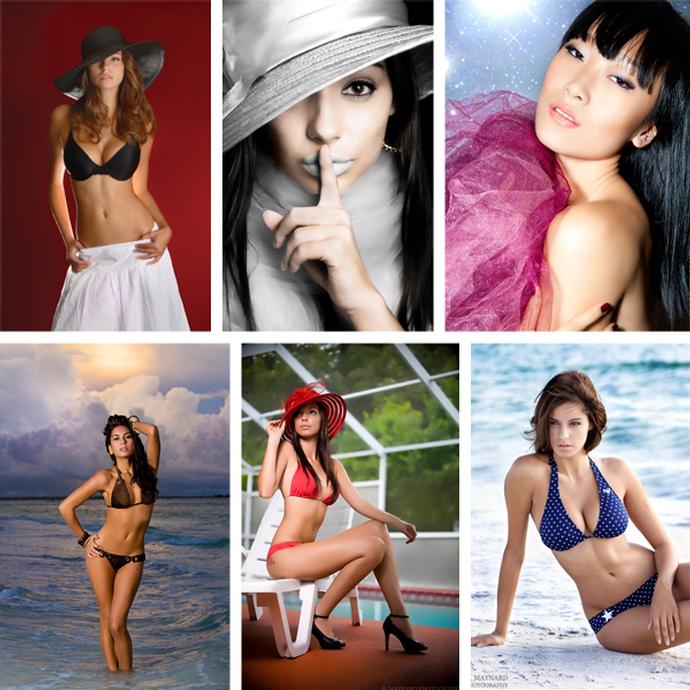
2. Be careful with mixed lighting
One of the fastest ways to get odd skin tones is to mix daylight, tungsten, LED, and fluorescent sources in the same frame. If your subject is lit by warm indoor lamps and cool window light at once, skin can become patchy or difficult to correct. Try to simplify the scene so one main light source defines the portrait.
Dial In Camera Settings Thoughtfully
3. Set white balance intentionally instead of guessing
Auto white balance can work well, but it may shift from frame to frame, especially with changing backgrounds or colored clothing. If consistency matters, choose a fixed white balance preset or set a custom white balance. This becomes especially important for portrait sessions where you want a cohesive final gallery.
4. Expose skin carefully to preserve natural color
Overexposed highlights can wash out complexion and remove subtle tonal transitions, while underexposure can make skin look muddy. Watch your histogram and highlight warnings, and expose with enough room to retain detail in the brighter areas of the face. Learning to balance exposure and expression is part of what makes portrait education so valuable, as seen in sessions like NJCS: Travel Portraits with Bobbi Lane.

Pay Attention to Skin Before the Shutter Clicks
5. Minimize dryness and shine for more even-looking color
Skin preparation affects how light reflects and how color records on camera. Dry patches can catch light unevenly, and excessive shine can create bright hotspots that distort tone. A simple product like Nivea Skin Creme Small Tin can be useful in a portrait kit for smoothing small dry areas before a session, though it's best applied sparingly to avoid extra shine.

6. Watch for color casts from clothing and surroundings
Bright green grass, red shirts, vivid walls, or colored reflectors can all bounce unwanted color into your subject's skin. If skin tones look off, check the environment before blaming your camera settings. A neutral reflector, a slight position change, or a different background can make a major difference.
Use the Right Approach for Your Shooting Style
7. For phone portraits, keep lighting simple and clean
Smartphones can produce excellent skin tones when the light is flattering and uncluttered. Avoid overhead room light, move closer to a window, and tap to expose for the face. If mobile portraiture is part of your workflow, CS: Taking iPhone Portraits with Kareem Hamdi highlights techniques that can help you get more polished results from a compact setup.

8. Fashion and dramatic portraits still need believable skin
Stylized lighting can be bold and contrasty, but skin still needs to feel intentional rather than overly saturated or artificially orange. In beauty or fashion work, keep an eye on how gels, makeup, and post-processing interact. Creative sessions like EXPO: Bold and Beautiful Fashion Portraits with Joe Edelman can be inspiring for seeing how expressive lighting and strong color can still complement the subject.

Refine Skin Tones in Post-Processing
9. Make selective adjustments instead of global corrections
If skin tones are close but not perfect, avoid shifting the entire image unless necessary. Target the orange and red channels carefully, and use masks to adjust the face without altering wardrobe, background, or hair color. Small changes in tint, saturation, and luminance usually look more natural than heavy edits.
10. Keep movement and skin color balanced in dynamic portraits
When photographing dancers, performers, or active subjects, it's easy to focus on motion and forget color consistency. Fast-changing stage lights or mixed performance lighting can wreak havoc on skin tones, so shoot with correction in mind and consider a consistent reference frame when possible. Educational events like EXPO: Portraits in Motion with Suzette Allen can offer helpful insight into handling expressive portrait scenarios.

11. Learn to recognize when the scan or digitization is the issue
For film portrait shooters, skin tone problems may happen after capture during scanning or digitizing. If your negatives look good but your files feel too magenta, too green, or flat in complexion, your scan workflow may need attention. Film Lovers Event: Getting Better Scans with Your Digital Camera (Philly) is a reminder that strong color starts with a reliable conversion process.

Train Your Eye With Practice
12. Study great portrait work and compare across lighting setups
The more portraits you review, the faster you'll recognize healthy, flattering skin color. Compare daylight portraits to studio images, and notice how subtle shifts in exposure, shadow depth, and white balance change the feeling of the face. Live shoots such as EXPO: Musical Portraits Live Shoot with Jesse Korman are useful inspiration for seeing how creative setups can still preserve appealing tones.

Conclusion
Better skin tones come from a simple but powerful combination: flattering light, clean white balance, careful exposure, and restrained editing. Start by simplifying your lighting, watch for environmental color casts, and make subtle corrections instead of heavy-handed ones. With practice, you'll develop a reliable eye for portraits that feel natural and polished. For more inspiration, education, and portrait tools, explore what Unique Photo has to offer and keep refining your portrait craft with every session.