Portrait Photography FAQ: Indoor Gear, Lighting, Full-Frame & Posing Tips
Portrait photography does not have to start with a massive studio or the most expensive camera body in the store. For most photographers, great portraits come from a smart mix of lens choice, flattering light, clear direction, and the ability to help subjects feel comfortable in front of the camera.
Below, our team at Unique Photo answers some of the most common portrait questions we hear from photographers building an indoor setup, choosing between camera formats, and trying to get more natural results from real clients.
What camera and lens combo is best for indoor portraits?
For indoor portraits, lens choice usually matters more than the camera body. A fast prime in the 50mm to 85mm range is a classic starting point because it gives you flattering perspective, strong background separation, and enough light-gathering ability to work indoors without pushing ISO too far. If you have more room, an 85mm lens is a favorite for headshots and tighter portraits. In smaller spaces, a 50mm is often easier to use and still produces a natural look.
As for the camera body, both full-frame and APS-C systems can produce beautiful portrait results. A full-frame camera can make it easier to achieve shallower depth of field and cleaner files at higher ISO, but an APS-C body paired with a sharp fast lens is still very capable for family portraits, seniors, business headshots, and creative studio work. If you are shooting with a DSLR system such as a Nikon D850, a solid camera-specific reference can help you get more from the body you already own.
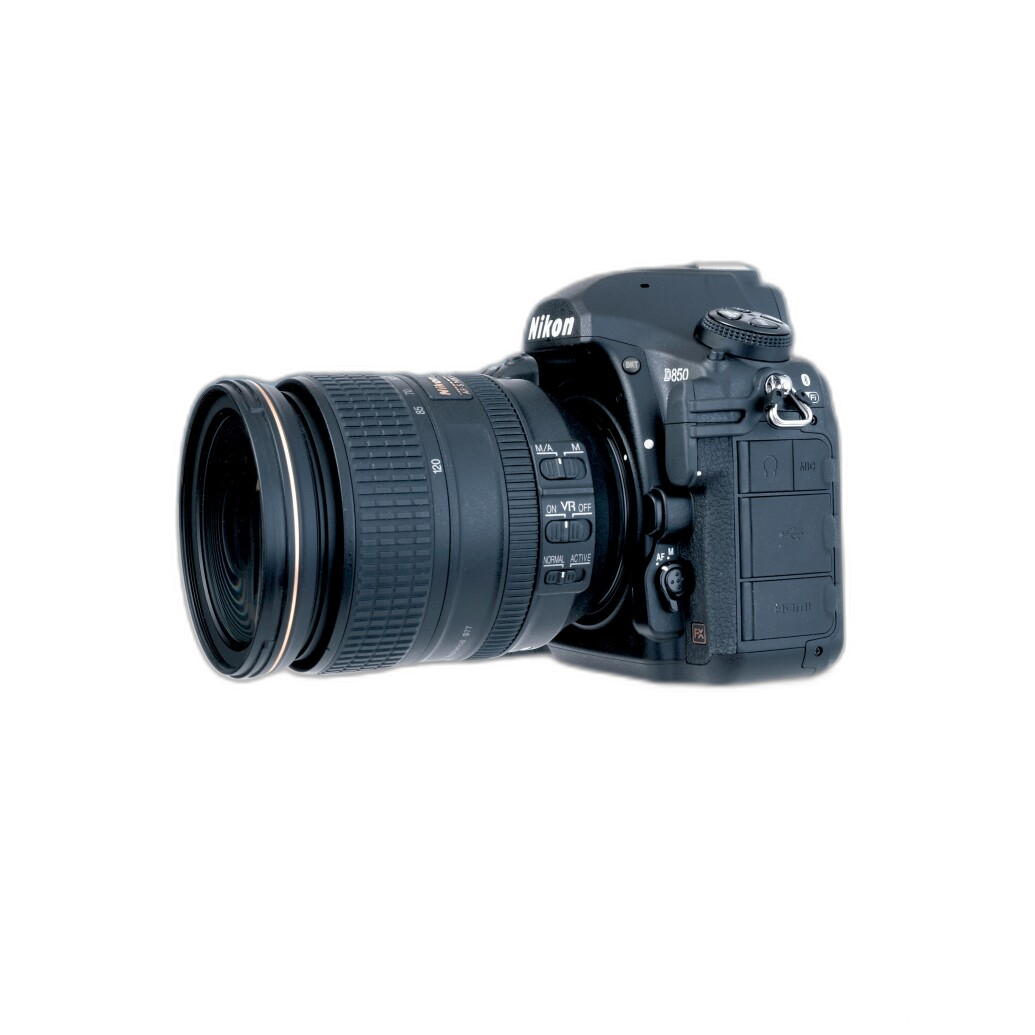
The Nikon D850 Guide to Digital SLR Photography by David Busch is a useful resource for photographers who want to better understand autofocus behavior, exposure controls, and camera customization for portrait sessions.
Which lenses are most flattering for portraits at home?
The most flattering portrait lenses tend to avoid wide-angle distortion and provide moderate compression. In practical terms, that means 50mm for full-body and half-body portraits in tight rooms, 85mm for classic head-and-shoulders work, and a short telephoto zoom if you want flexibility without changing lenses. In an APS-C setup, a lens around 35mm to 56mm often gives a similar field of view to traditional portrait favorites on full-frame.
If you shoot in a home studio, think about how much working distance you actually have. A longer lens can look fantastic, but it is only helpful if you have enough room to step back. Many photographers buy an 85mm because of its reputation, then discover a 50mm gets used more often indoors. If you regularly photograph couples, kids, or small groups in limited space, starting slightly wider can make your sessions much smoother.
What affordable lighting setup works well for home studio portraits?
A simple one-light setup is still one of the best values in portrait photography. One flash or strobe paired with a softbox or umbrella can produce polished, professional-looking light in a spare room, basement, or office. Start with a key light at roughly 45 degrees from your subject, add a reflector on the opposite side if you want to lift shadows, and use a neutral wall or seamless background for a clean look.
If your budget is tight, prioritize light quality over quantity. A single light modified well will usually outperform a cluttered setup with multiple bare lights. Softboxes are especially popular for indoor portraits because they create soft, directional light that is easy to control. Umbrellas are quick and affordable, while reflectors help you shape contrast without adding another powered light.
If you want to improve your understanding of light placement, feathering, and simple setups that scale from beginner to advanced work, educational workshops can be one of the smartest upgrades you make.
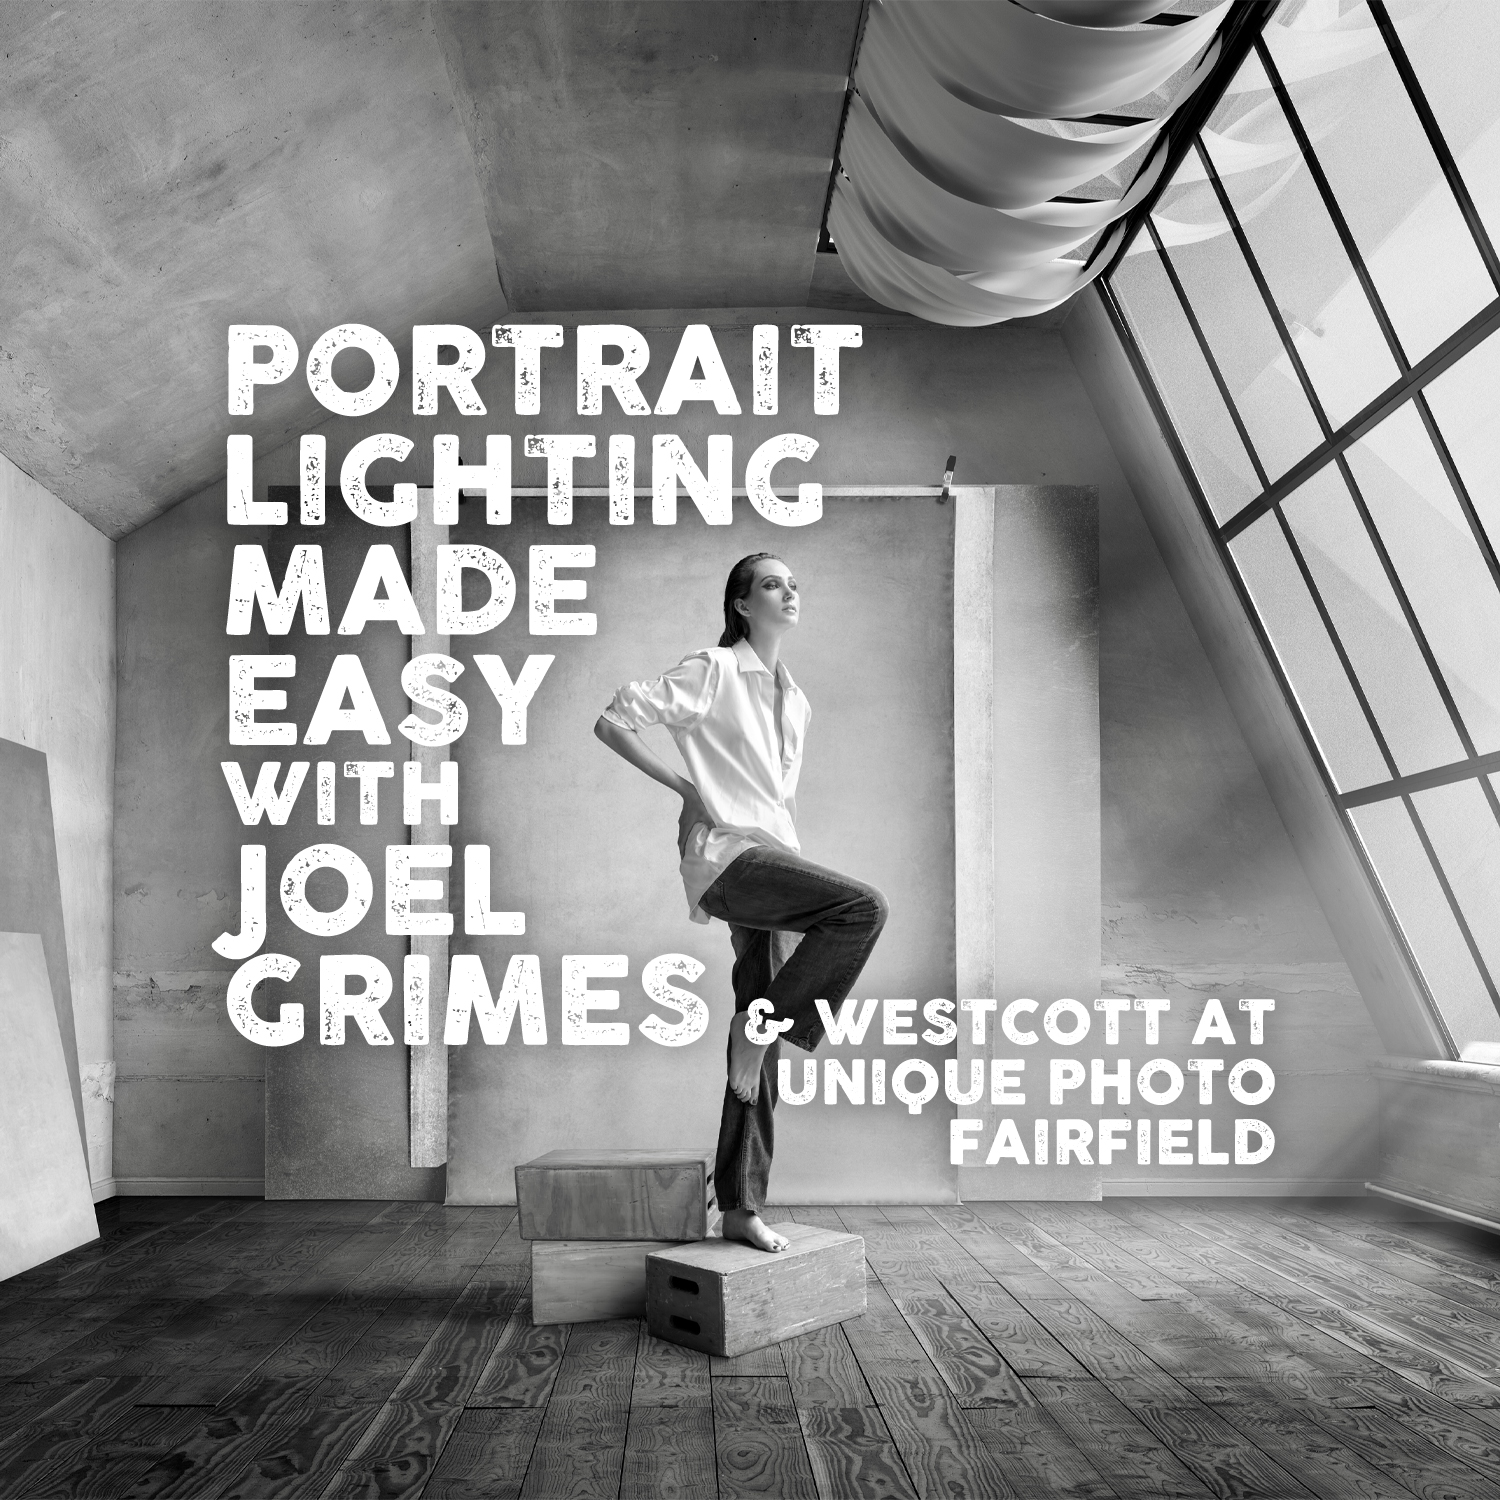
Portrait Lighting Made Easy with Joel Grimes is an excellent fit for photographers who want clearer guidance on shaping light for portraits without overcomplicating their home studio workflow.
Do you need full-frame for professional portrait work?
No, you do not need full-frame to create professional portrait work. Full-frame cameras offer real advantages, including better low-light performance, potentially greater dynamic range, and easier access to very shallow depth of field. Those benefits are helpful, but they are not the same thing as a requirement.
Professional portraits are absolutely possible with APS-C cameras when the photographer controls light well, chooses an appropriate lens, and creates a strong client experience. Clients respond to flattering posing, expression, retouching, and consistent results more than they respond to sensor size. If your current camera gives you reliable autofocus and image quality that meets your delivery needs, investing in better lighting, education, and lenses may produce a bigger improvement than switching formats immediately.
In other words, full-frame can be a great tool, but it is not a shortcut. Good portraits come from decisions, not just specs.
How should I light indoor portraits if I want soft, natural-looking results?
To get soft, natural-looking portraits indoors, use a large light source close to the subject. The closer and larger the modifier appears relative to the subject, the softer the light will look. Position the light slightly above eye level and angle it down gently to create flattering facial modeling. Watch the shadow under the nose and chin; subtle shaping adds depth, while overly deep shadows can feel harsh.
You can also mimic window light by placing your softbox off to the side and allowing the shadow side of the face to fall off gradually. If the shadows become too dramatic, bring in a reflector or adjust the light to a more frontal position. Small changes in angle can completely change the mood of the portrait.
Photographers who want guided instruction on building stronger portrait technique may also benefit from a workshop focused specifically on creating polished portraits from capture through client-facing execution.
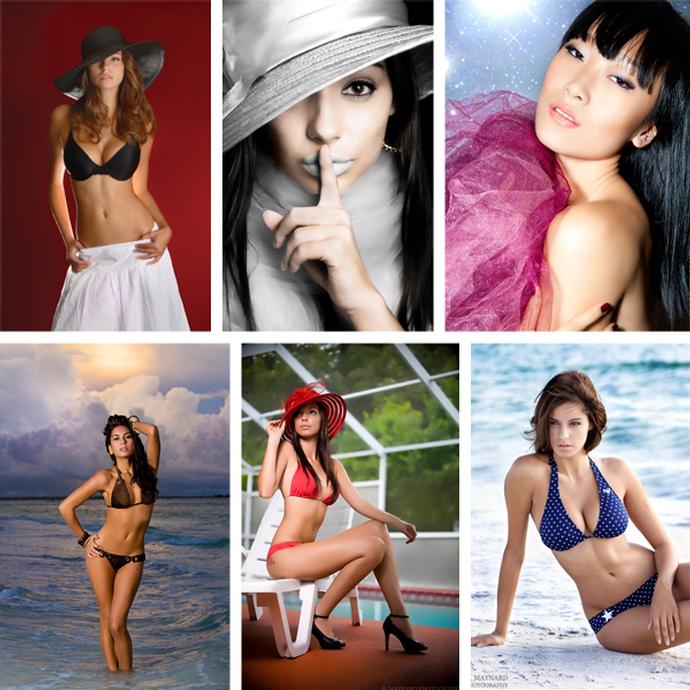
Stunning Portraits Workshop with David Maynard and ExpoImaging is a strong option for photographers looking to refine both lighting and portrait-making technique in a practical learning environment.
What are the best tips for posing clients naturally?
Natural posing starts before the shutter clicks. Most clients are not professional models, so they need simple, encouraging direction rather than complicated posing language. Start with posture: ask them to stand tall, shift weight onto the back leg, relax the shoulders, and bring the forehead slightly toward the camera to define the jawline. Small adjustments usually photograph better than dramatic poses.
Instead of trying to freeze every limb perfectly, give clients something to do. Ask them to look out a window, smooth a sleeve, walk slowly toward you, turn back over the shoulder, or interact with a partner. Motion and micro-actions often produce more believable expressions than static posing. For seated portraits, pay close attention to hands, spine position, and neck extension, since these details can quickly make a pose feel stiff or flattering.
Another useful strategy is to build from easy poses into more expressive ones. Begin with a neutral stance, capture a safe frame, then gradually refine angles, hands, chin position, and expression. This keeps your subject from feeling overwhelmed and gives you a progression of strong options.
How do you get genuine expressions instead of forced smiles?
Genuine expressions come from interaction, pacing, and trust. Keep talking during the session so your subject never feels like they are performing in silence. Give positive feedback when something is working, and avoid over-directing every second. If the energy drops, change the pose, have the subject move, or shift the conversation away from the camera for a moment.
For families, couples, and kids, prompts often work better than commands. Ask a couple to tell each other something funny, have a parent whisper something silly to a child, or ask a senior to think of a recent accomplishment. These cues create reactions rather than rehearsed expressions. The key is to stay ready between formal poses, because some of the best portraits happen in the transitions.
It also helps to tether your expectations to the subject. A corporate headshot client may need calm confidence more than a broad smile, while a family session may call for warmth and movement. The right expression depends on the story you are trying to tell.
How important is editing for portrait photography?
Editing is important, but it should support the portrait rather than rescue it. Strong lighting, careful exposure, and good posing make post-production much easier. In portrait work, editing often includes color correction, skin tone refinement, light retouching, contrast control, and subtle background cleanup. The goal is usually to present the subject at their best while keeping the image believable.
If you are newer to portrait retouching, learning broader post-production skills can improve your efficiency and consistency. Techniques like selective adjustments, tonal control, and careful enhancement can make your final portraits look more polished without appearing overprocessed.

Product Photography and Post Production Editing with Blake Taylor is geared toward product work, but many of the core post-production concepts translate well to photographers who want cleaner, more controlled editing habits across genres.
What is the smartest upgrade if I want better portraits right now?
For most photographers, the smartest upgrade is whichever tool solves the biggest weakness in the current workflow. If your portraits feel flat, invest in lighting education and a good modifier. If your subjects look distorted or backgrounds feel too busy, consider a more suitable portrait lens. If your sessions feel awkward, spend time improving your communication and posing direction. Better portraits usually come from removing one bottleneck at a time.
Education is often underrated here. A well-taught class or workshop can improve your results across every camera you own and every portrait session you shoot afterward. That is especially true if you are trying to move from casual portraits to paid client work and want a more repeatable process.
At Unique Photo, we carry gear, books, and learning resources to help photographers build stronger portrait skills at every level. Whether you are refining your indoor setup, exploring portrait lighting, or looking for hands-on instruction, our team can help you choose the right next step for your photography.