It seems that the world of film photography has fallen victim to a strange irony: as sales of film and film cameras continue to plummet, getting your developed film into the digital medium is becoming a more lucrative market almost daily. It's obvious, really...I think I can safely say that the majority of people reading this have at least one or two chests full of 35mm or medium-format slides and negatives somewhere in their home. While there are many options out there if you want to convert your silver-nitrate memories into digital files, a lot of them are pretty pricey. That point, however, doesn't need to be beleaguered anymore, as there are inexpensive options out there if you want to digitize all of your photos.
1.) Do It Yourself
Provided you have a digital SLR with (preferably) a macro lens, you can do a lot of negative scanning in your own home. There are already various techniques out there in order to accomplish this, all of which use your external flash, softened by a diffuser of some sort. The tools used to accomplish this vary between toilet paper rolls, glass table tops or picture frames, to custom-cut film holders. After shooting the individual frames, Lightroom or Photoshop is most often used to then invert the colors (since it's a negative), and tonal adjustments are then made.

The flash below the table and photo paper below the negative provide for an adequate backlight.
The most important aspects of this approach are to always check your focus, as you're basically capturing something that is the width of a piece of paper. Also, check the "digital negative" photos you take for highlights by always checking the histogram/highlight display feature and adjust flash output as necessary. You don't want to blow out any more details than may already be lost in the original image. Finally, shoot in RAW! This will give you the most control over the image data once you've imported your digital negatives into your editing software.
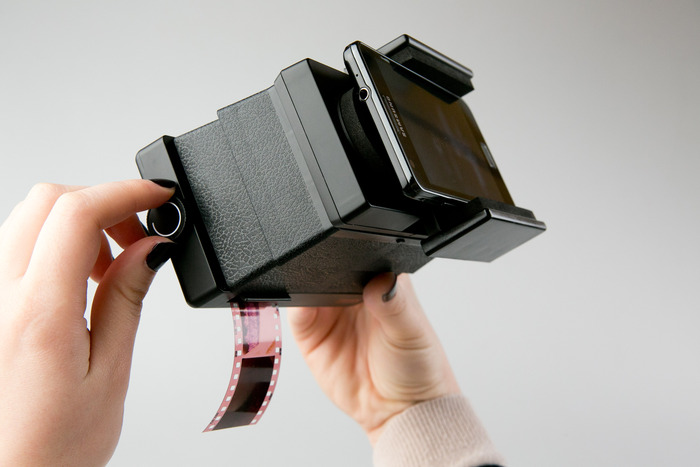
2.) Use Your Phone

Admittedly, this method may be targeted to the Instagrammer or casual film shooter. Lomography currently has a Kickstarter page for their newest film adventure, a 35mm negative scanner that attaches to your smartphone. The free app that ties to the scanner can invert the photos, piece together panoramas, and animate a series of photos. While this all sounds great, keep in mind that the app probably converts the negative image into a JPEG rather than a RAW file, thus eliminating the possibility of extensive editing and adjustments. Also, the quality of your digital negatives will be at the mercy of your phone's camera quality, so if you want excellent image transfer, option number 1 may be the better choice for you.
3.) Scanners

Make sure to get one with a film negative slot!
Although scanners have been around and virtually commonplace since the beginning of this millennium, more scanners nowadays, like the Canon 5600F, are offering 35mm negative scanning options for a very fair price. Some of them even provide an attachment to scan whole 5-frame negative strips in a single shot, which is ideal for that box full of crumpled and crammed neatly organized negatives in your attic. Get one that scans in high-dpi and has a dedicated negative mode, which most likely uses a backlight to scan the negatives.
So, if you're experiencing a bit of a renaissance with film as I am, these digital negative ideas are intriguing to say the least. Or, if you've been tasked with finding a way to digitize your family's endless cache of negatives, as I also have been, some or all of these methods may prove extremely useful in the future. Happy digital developing!
Tim Kauger is a blogger and photographer based in Short Hills, NJ. You can visit his website here.