New to editing your photos or videos? This guide is for beginners who want reliable, repeatable results without getting overwhelmed. We’ll cover the core steps of a clean post-processing workflow, quick wins that make the biggest visual difference, and a few smart products and classes that accelerate your learning—so you spend less time guessing and more time creating.
Build a simple, repeatable workflow
Before you move sliders, set yourself up for success:
- Ingest and organize: Create a consistent folder and file-naming structure. Add keywords and ratings as you cull.
- Work non-destructively: Use software that preserves your originals (e.g., RAW processing or adjustment layers).
- Edit in this order: global corrections → local adjustments → cleanup → export. It’s faster and more consistent.
Fix exposure and white balance first
Start with the foundation. Adjust exposure and contrast to set the overall brightness and midtone pop. Then set white balance so whites look neutral and skin tones look natural. Small tweaks here prevent color shifts and muddy shadows later.
Make color and contrast pop (gently)
- Use Highlights/Shadows to recover detail before adding contrast.
- Adjust Vibrance before Saturation for more natural color.
- Use a tone curve or subtle clarity to add depth without halos.
Clean up with purpose
- Lens corrections first (profile, distortion, vignetting).
- Noise reduction sparingly; then add sharpening to restore detail.
- Spot removal and local dodging/burning to guide the eye.
- Crop with intent—establish horizon and subject balance.
Export with intent
- Social/web: sRGB, around 2048–4096 px on the long edge, moderate compression.
- Prints/albums: sRGB or printer profile, 300 ppi at print size, minimal compression.
- Archive: keep originals plus final exports; maintain a simple backup strategy (onsite + offsite/cloud).
Video beginners: smooth your edit with clean audio
Color and cuts matter—but audio is what makes edits feel professional. Recording clean, unclipped sound dramatically reduces repair time in post. 32-bit float recorders can capture a very wide dynamic range, giving you more headroom and fewer reshoots.
Learn faster with the right class
If you’re just starting, a focused class can shave months off your learning curve. Here’s a quick comparison of two great beginner-friendly options available at Unique Photo:
| Product | Format | Skill Level | Post-Processing Focus | Cost |
|---|---|---|---|---|
| Product Photography and Post Production Editing with Blake Taylor | Hands-on class (Unique University) | Beginner to early-intermediate | Product retouching, clean backgrounds, polish for e-comm/portfolio | Paid class |
| *FREE RSVP* Videography Beginners Guide with Sony (Philly) | Live session/event | Beginner | Foundational video workflow; intro to editing and camera settings | Free RSVP |
Recommended picks for beginners
Product Photography and Post Production Editing with Blake Taylor

This hands-on Unique University class is ideal if you want practical, repeatable post techniques for product shots—perfect for small businesses, creators, and anyone building a clean portfolio. Expect step-by-step lighting-to-editing guidance so your images look polished and consistent.
*FREE RSVP* Videography Beginners Guide with Sony (Philly)

A friendly on-ramp to video. You’ll learn the core camera settings and beginner workflow that make editing smoother later—think exposure, picture profiles, and basic post considerations. A great no-cost way to kick-start your video journey.
Zoom H6Essential Series 6-Track 32-Bit Float Handheld Recorder
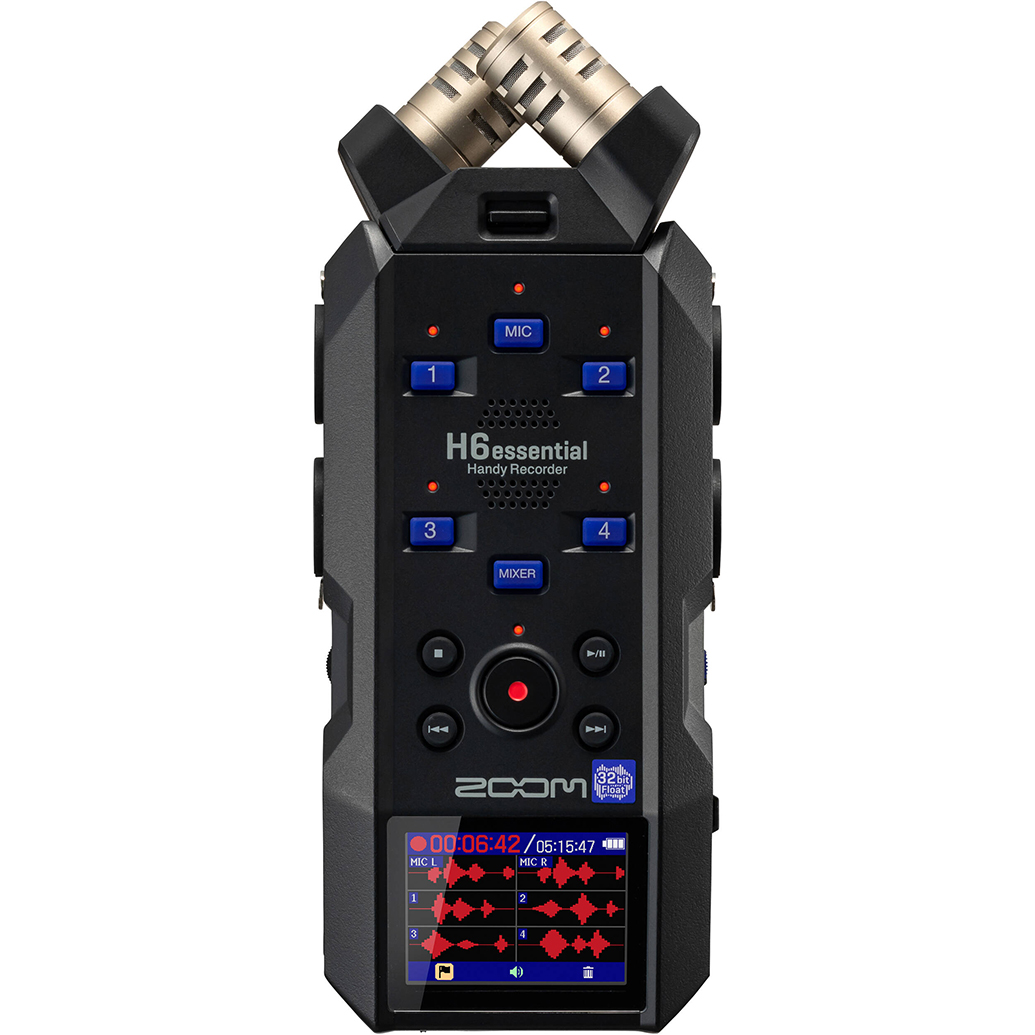
For new video editors, clean audio is the biggest time-saver in post. The H6Essential captures 32-bit float audio, giving you exceptional headroom to prevent clipping and reduce rescue work later. Six tracks and swappable capsules make it flexible for interviews, run-and-gun, or small productions. Tip: add a compatible windscreen for outdoor shoots to minimize noise at the source.
Pioneer Photo Albums Slim Line Post-Style Pocket Album (4x6, Black)

Great edits deserve great presentation. After you export print-ready files, collect your best 4x6s in a slim, durable album. It’s a simple way to quality-check color and contrast on paper, build a tangible portfolio, and share your progress with clients or friends.
Our Pick
Conclusion
Mastering post-processing starts with a simple workflow: correct exposure and white balance, add tasteful color and contrast, clean up gently, and export for your target use. Invest in learning that shortens the path to polished results and consider tools that reduce fix-it time in post—especially clean audio for video. When you’re ready to take the next step, shop gear and book learning experiences at Unique Photo, where you’ll find beginner-friendly classes, events, and tools to grow with your creativity.