From sunrise landscapes to trail-side macro, our Unique Photo community spends a lot of time shooting outdoors with budget-friendly tripods. Below, members share what’s held up, what’s worth upgrading, and how to squeeze pro-level stability from affordable legs under frequent, real-world use.
What makes a great budget tripod for outdoor use?
When you’re buying on a budget, it’s less about brand prestige and more about how the features match your field needs. Members consistently recommend focusing on:
- Leg locks: Twist locks are quick and weather-resistant; flip locks are easier with gloves and provide strong clamping. Look for positive engagement and minimal flex.
- Material: Aluminum is the best value for rugged durability; carbon fiber reduces weight and vibration but costs more.
- Feet and angles: Interchangeable feet (rubber/spiked) and three leg-angle stops improve stability on rock, sand, and snow.
- Center column design: A short or removable center column increases low-angle stability; reversible columns help macro and low shots without extra gear.
- Load capacity and height: Aim for at least 1.5–2x your camera/lens weight, and a working height near eye level without fully extending the center column.
Member-tested durability under frequent outdoor use
Out in the elements, budget tripods succeed or fail at the small details. Here’s how members say different designs hold up:
- Weather sealing: Rugged legs with O-rings or tight tolerances keep grit out of locks and tubes. Aluminum beats salt and spray better when you rinse and dry promptly.
- Locking hardware: Stainless or coated fasteners resist corrosion. Avoid soft fasteners that strip; check for replaceable parts.
- Feet traction: Rubber feet are ideal on rock and indoors; spikes bite into dirt and snow. Pivoting feet reduce chatter on uneven terrain.
- Center column stability: Tall columns amplify vibration in wind; consider a short column or a hook to hang weight for damping.

Aluminum vs. carbon fiber on a budget: which should you choose?
For frequent outdoor use, members generally split recommendations this way:
- Aluminum for value and toughness: Heavier, but forgives bumps and budget constraints. Excellent choice for hikers who prioritize durability over ounces.
- Carbon fiber for frequent travel: Lighter with better vibration damping, helpful for long lenses and windy ridgelines. Worth it if you carry your tripod all day.
Either way, prioritize the leg design and locks over chasing the lowest weight number. A well-built aluminum set with solid locks often outperforms a lighter but flexy carbon option in gusty conditions.
Heads, locks, and low-vibration setup
Performance hinges on pairing the right head and setup:
- Ball heads: Compact and fast, ideal for landscapes and travel. Look for a strong clamp (Arca-style compatibility is helpful) and a separate pan lock.
- Pan/tilt heads: Great for video and precise framing. Heavier, but predictable movement for horizon-critical shots.
- Leg lock technique: Extend thicker sections first. Avoid maxing the center column in wind; use the tripod hook to add mass.
- Ground contact: On soft surfaces, spikes or pivot feet minimize micro-movement and reduce blurry frames at slow shutter speeds.
Real-world field notes from frequent outdoor use
- Hiking and travel: Compact 4-section legs fit packs better, but 3-section legs can be stiffer. Members often accept an extra half pound for sturdier locks.
- Wind management: Keep the center column low; spread legs wider; hang a bag from the column hook—just let it touch the ground to prevent swinging.
- Cold-weather shooting: Flip locks are easier in gloves. If you prefer twist locks, pick models with chunky grips and de-ice them with a warm cloth, not force.
- Sand and surf: Rinse with fresh water ASAP, then dry fully. Avoid extending the lowest leg section into salty surf unless you’re committed to thorough cleanup.
Maintenance: extend the life of a budget tripod
- Routine rinse and dry: After beach or muddy trails, remove leg sections, rinse, and dry. Salt left in tubes corrodes fasteners and chews up bushings.
- Tighten and check: Periodically tighten hinge bolts and screws. A quarter-turn keeps play from creeping in.
- Lubrication: Use a tiny bit of silicone-based lubricant on threads—avoid oils that attract grit.
- Replace wear parts: Swap worn feet and bushings; it’s cost-effective and restores like-new stability.
Budget accessories that make a noticeable difference
Small, affordable upgrades unlock better performance from budget tripods—especially outdoors:
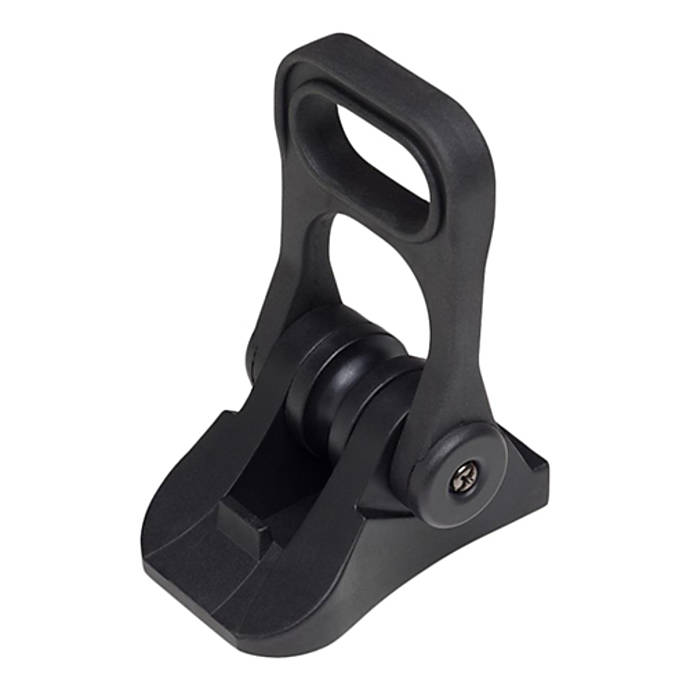
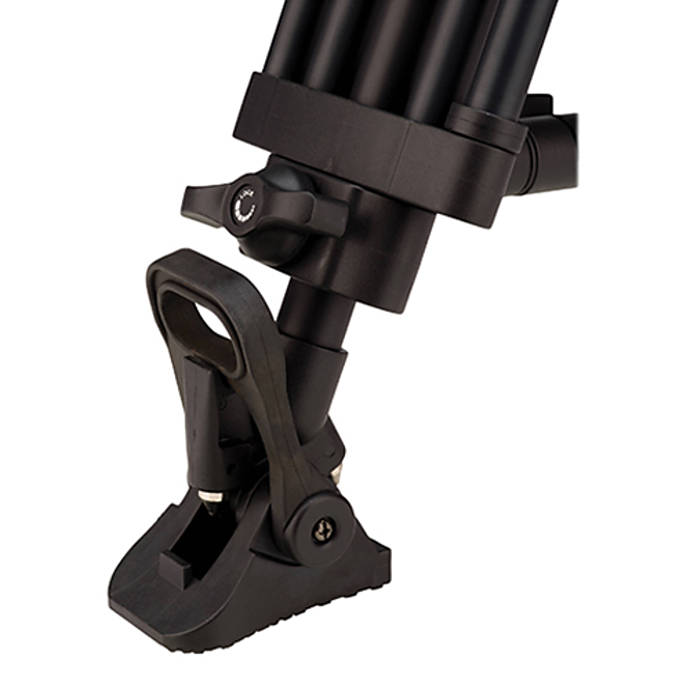
- Benro SP02 Rubber Pivot Foot for Twin Leg Tripods: Pivoting rubber feet improve grip on uneven rock and reduce vibration. Members appreciate the easy swap design and the way pivoting keeps more rubber in contact with slick surfaces. Available at Unique Photo.
- Benro Carbon Fiber Extension Columns (0/1/2 Series): When you need extra height without buying a new set of legs, these lightweight columns are a clean, modular solution. Use them sparingly in wind; keep weight on the hook if you extend fully.
- Short center columns: Lower your camera without splaying legs to extremes—handy for macro and ultra-low landscapes.
- Spiked feet sets: Essential for dirt, grass, and snow. They prevent drift during long exposures.
Community perspectives: learning together at Unique Photo
Members often refine their setups after hands-on learning at Unique Photo events and panels, where technique can make budget gear punch above its class.


Our instructors and community pros regularly share how to stabilize setups in challenging light and weather, so you get more keepers from the gear you already own.
FAQs: budget tripods for outdoor use
How much should I spend? Members report solid outdoor performance from aluminum kits in the $100–$200 range. If you hike long distances, consider carbon fiber around $250–$350 for less fatigue.
Will accessories really help stability? Yes—better feet, shorter columns, and proper heads reduce vibration more than a small weight reduction alone.
Can I use a budget tripod with a telephoto? Keep leg sections thicker (avoid extending the thinnest), add mass on the hook, and use a sturdy head. For birding and long exposures, spiked or pivoting feet help significantly.
Final thoughts and internal linking suggestions
Budget tripods can absolutely thrive outdoors when you prioritize strong leg locks, sensible height, and smart accessories. Unique Photo stocks a wide range of tripod solutions and hosts learning experiences that help you shoot confidently with affordable gear.
Internal linking ideas for your next read and shop:
- Link to Tripods & Monopods category for budget-friendly aluminum and carbon options.
- Link to Benro Tripods and Accessories for feet, extension columns, and replacement parts.
- Link to Tripod Heads (ball, pan/tilt, video) to pair the right head with your legs.
- Link to Quick Release Plates & Clamps for Arca-style compatibility and secure mounting.
- Link to Unique Photo Workshops & Events to learn stabilization techniques in the field.
- Link to Blog: Outdoor Photography Tips for wind management, long exposure, and macro stability.
Visit Unique Photo online or in-store to compare setups side-by-side and get personalized recommendations for your outdoor shooting style.