Get More Keepers on Film: A Practical Guide to Metering, Exposure, and Avoiding Common Mistakes
If you’re new to film or returning after years with digital, this guide is for you. We’ll translate metering and exposure into simple, repeatable steps that work in the real world—so your negatives scan and print beautifully. You’ll also find gear recommendations and supplies you can pick up at Unique Photo to support your film workflow.
Metering Basics: How to Read Light for Film
Film isn’t as forgiving as modern sensors, but with the right metering habits, it’s predictable and gorgeous.
- Know your film type: Color negative and B&W negative film love extra exposure; slide (reversal) film demands accuracy.
- Incident vs. reflective: Incident meters read the light falling on your subject (great for consistency). Reflective meters read light bouncing off your subject (built into most cameras) and can be tricked by very bright or dark scenes.
- Spot meter smart: If using a spot meter, aim at what you want to render as mid-tone, or meter a highlight/shadow and adjust exposure accordingly.
Simple metering workflow
- Set ISO to your chosen exposure index (EI). For color/B&W negative, consider rating a stop slower (e.g., ISO 400 shot at EI 200) for beautiful, dense negatives.
- Read the light: If incident, shade the dome toward camera from subject position. If reflective, meter a mid-toned area or use spot on a known reference.
- Bias for film type: Negative film – give 1/3 to 1 stop more exposure than the meter suggests in high-contrast scenes. Slide film – protect highlights; it’s safer to slightly underexpose than overexpose.
Exposure by Film Type
- Color negative (C-41): Wide highlight headroom; shadows get noisy if underexposed. Favor slight overexposure (+1/3 to +1 stop).
- Black & white negative: Flexible in development; meter for shadows you want to see, then expose to place them with detail (+1/3 to +2/3 stop is often lovely).
- Slide (E-6): Narrow latitude; highlights clip quickly. Expose for highlights, and bracket if the scene is contrasty.
Sunny 16 Cheat Sheet
When you’re meter-less: On a bright sunny day, set f/16 and use the reciprocal of your ISO for shutter speed (ISO 100 → 1/100–1/125s). Adjust for conditions:
- Bright sun: f/16
- Light overcast: f/11
- Overcast: f/8
- Heavy overcast / open shade: f/5.6
ISO, EI, Push/Pull
- Box speed vs. EI: Shooting at EI 200 on a 400-speed negative film gives extra exposure. Tell your lab if you need push/pull development for slide or if you deliberately under/overexposed.
- Push: Underexpose intentionally, then extend development to lift shadows/contrast (common for low light). Expect more grain/contrast.
- Pull: Overexpose intentionally, then reduce development to tame contrast in harsh light.
Reciprocity Failure
For long exposures (often >1s for many films), film “slows down.” Check your film’s reciprocity data and add time—and often a color-correction filter for color films. Bracket when possible.
Common Mistakes and Easy Fixes
- Backlit subjects look muddy: Meter incident from subject position, or spot the face and add exposure; consider a reflector or open shade.
- Underexposed negatives: Most common. For negative film, rate slower (e.g., 400 → 200) and bias +1/3–1 stop in contrasty scenes.
- Blown highlights on slide film: Meter the brightest important highlight, then set exposure so that highlight sits ~2 stops above mid (or bracket).
- Mixed lighting casts: Use appropriate filters (e.g., warming, cooling) or shoot B&W in tricky lighting.
- Inaccurate shutters on older cameras: Test at a lab or bracket until serviced.
Metering Methods Compared
| Method | Best For | What to Meter | Bias for Film | Pros / Cons |
|---|---|---|---|---|
| Incident | Consistent results in varied scenes | Light falling on subject | Negatives: +1/3 stop in harsh light; Slide: stay exact | Very consistent; requires subject access |
| Reflective (Matrix/Center-weighted) | General use with in-camera meter | Overall scene (can be tricked) | Negatives: +1/3 to +2/3; Slide: exposure comp as needed | Convenient; can misread high-contrast scenes |
| Spot | High-contrast or precise placement | Specific tone (highlight/shadow) | Negatives: place shadows with detail; Slide: protect highlights | Precise; requires practice |
Recommended Gear & Supplies
Build a reliable workflow with film, filters, and (if you print) the right paper and chemistry. The options below are available from Unique Photo.
Lomography - Potsdam Kino 120 100 ISO 36 exp Black and White Film (LMF2027)
A classic, fine-grained 100-speed B&W emulsion with beautiful tonality—great for learning exposure discipline on medium format. Responds well to rating at EI 80–100 and can be pushed for moodier contrast.
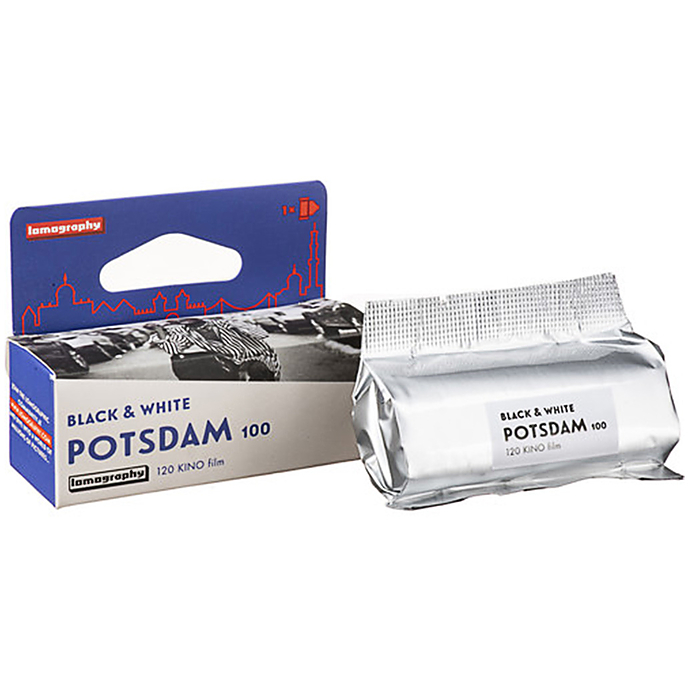
- Why we like it: Wide exposure latitude for B&W, lovely skin tones, and forgiving of slight overexposure.
- Tip: Meter for your shadows; give an extra 1/3 stop in harsh light for printable negatives.
Tiffen 46mm Photo Essentials Kit/TPK1
Filters are powerful for film. An essentials kit typically covers protective, polarizing, and basic color correction tools—perfect for taming reflections, adding contrast to skies, and balancing color. Verify thread size for your lens.
- Why it helps: Polarizers deepen skies and cut glare; color filters fine-tune film response especially in mixed light.
- Tip: With filters that reduce light (e.g., polarizer), compensate exposure by the filter factor.
Fujifilm DIGITAL PRO 12X354 GLOSSY OLD 600022885 (FJP24312)
RA-4 color paper for darkroom or minilab printing. If you’re taking your film all the way to prints, consistent paper stock is key to predictable results.
- Best for: Color negative printing workflows in RA-4 chemistry.
- Tip: Keep paper cool and dry; handle under safe light per RA-4 requirements.
Fujifilm Digital RA PRO Developer/Replenisher Part B (200L) 600005097 (FHY22767)
Professional RA-4 chemistry component for color paper processing. For advanced users managing their own darkroom or minilab.
- Note: This is Part B. Use with corresponding Parts A and Starter per Fujifilm process specs.
- Tip: Maintain temperature and replenishment rates meticulously for consistent prints.
Quick Checklist Before You Shoot
- Rate your film: Negative? Consider rating slower for richer negatives. Slide? Stay at box speed.
- Choose a metering method and stick to it for the roll.
- Account for filters and reciprocity.
- Bracket scene-makers, especially with slide film or unfamiliar lighting.
Conclusion
Nail your exposure by matching metering technique to film type, biasing for negative vs. slide, and avoiding the usual pitfalls like backlight underexposure and ignoring reciprocity. For film, filters, and printing supplies, Unique Photo has you covered—from reliable black-and-white stocks like Lomography Potsdam Kino 120 to professional RA-4 paper and chemistry. Visit Unique Photo online or in store to build your film toolkit with expert advice.