It isn’t a hard and fast rule that photo manipulation techniques always have to include several messy layers. Various intricate photo manipulation methods can be solved using less than fifteen layers. This can be easily accomplished by taking advantage of certain smart tools while editing your photos. Below are eight simple tips to reduce the efforts, complexity, and time taken during photo manipulation.
1. Rendering Your Images: Photo manipulation commonly requires you to take different stock images or photos you yourself have shot and blend them with other images on a Photoshop canvas. Generally, the pen tool is used to cut out and merge such images onto a canvas. But, if it’s proving difficult to cut out the images using the pen tool, you can always opt for a program called “Vertus Fluid Mask”. With this program, you can render your images within a few minutes using the special masking tool of Photoshop. This program also helps negate rugged edges and worn out backgrounds from your images.
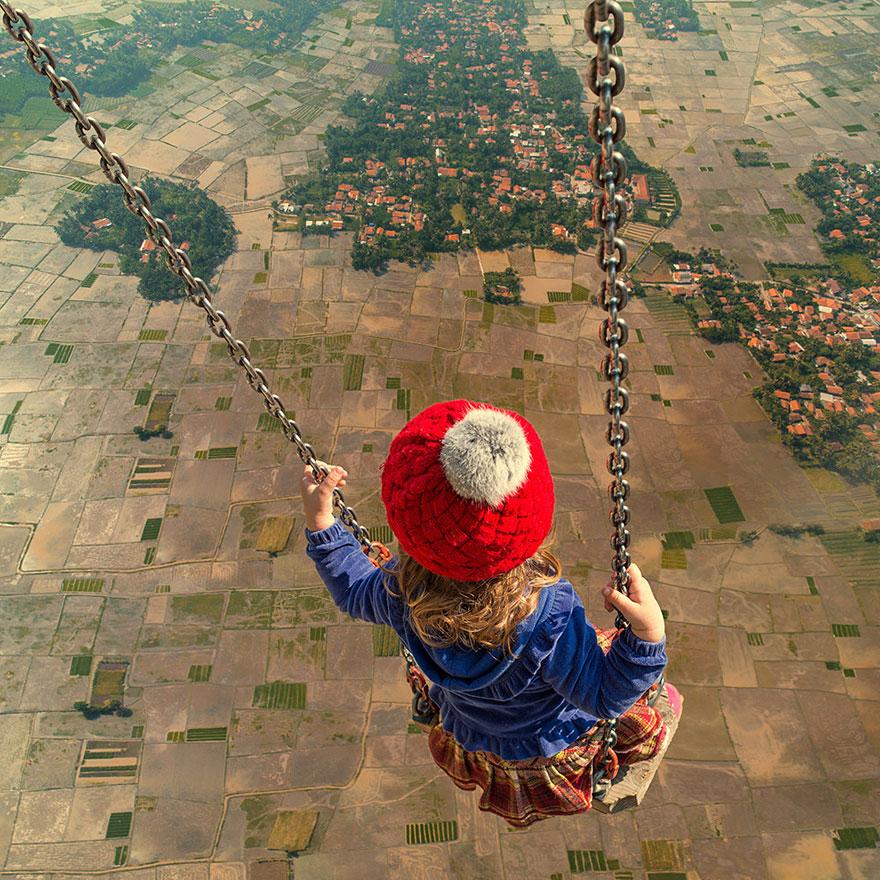
2. Proportion: This is one of the most important parts of photo manipulation, because all your subjects within a particular picture need to appear proportionate to each other in size and relativity. For instance, your pet cannot appear bigger than your house or your house cannot appear bigger than the background it’s in. If you wish your final photo to appear quite farfetched, then proportionality will play a key role in how your realistic your subjects appear in this farfetched setting. You also need to play close observation to where each subject will be placed in the final frame. Also, far off objects have to seem smaller than the ones that are nearer. In the end, irrespective of whether your image is meant to be far fetched or simplistic, everything inside the image must be in proper proportional harmony.

3. Texture Use: Even though textures don’t do much for the realistic appearance of your images, they eventually make a strong impact to how your images blend with each other. Since blending constitutes a major component of photo manipulation, textures forms a vital part in the eventual outcome of your images. They infuse depth to your photos. If you prefer a dirty and dark feel for certain images, you can always choose a texture with a rough surface background. In case, you prefer a smoother surface, you can go for the paper or wall texture. If you need more textures online, the “Blue Vertigo” website might prove helpful.
4. Color Blending: Color blending is useful when your images don’t merge with your background, your texture, or other images. Color blending techniques such as photo filters and gradient maps in Photoshop can either induce or diminish color in your images. This helps you either way; in instances where you wish to boost the color of your images as well as when you desire to reduce the color from your images. Ultimately, this enables various images to seamlessly merge with each other and produce a beautiful, coherent piece of artwork.
5. Combining Multiple Images: It’s necessary to carefully skim through multiple footages of stock images before deciding on the appropriate ones for your composition. You must plan your composition judiciously before compiling and blending together various images. An advisable trick is to first sketch the composition your want on a piece of paper, before beginning to compose it on Photoshop. After this is done, you’ll find it easier to choose the right stock images and know where to place them in your composition.

6. The Background and Foreground are Two Different Things: Though predefined backgrounds save a lot of time, it reduces the creativity and distinctness of your work. Rather, expend some time and energy in creating your own backgrounds and you’ll even have a lot of fun while doing so.
7. Finish Your Work on the Shadows, Highlights, and Reflections Before Merging Your Layers: Ensure that all your work including the minute touchups for your shadows, highlights, and reflections of each image are completed before you commence the blending of multiple images. If you aren’t extremely meticulous about this, parts of your final composition could appear on-dimensional and eventually take away from the final result and your hard work.
8. Use the Smudge Tool Prudently: The smudge tool is a great boon when it comes to accentuating your images. It can be used to effortlessly decrease noise, ghost, or flare in your images and also to conveniently diverse elements as well as different images. However, take care to not expose your images to excessive smudging, or else they stand the risk of losing out on depth and detail.
Using the above methods, it now becomes much easier to accomplish photo manipulation. These techniques coupled with your own experience and style are sure to help you in the long haul.
Photo Credits - Caras Ionut